树莓派开发
请注意
本教程以 Raspberry Pi 4 为例,介绍模块的硬件连接,以及 Python 和 C 示例的运行方法。
硬件连接
使用 15PIN 杜邦线按照下表连接模块与树莓派:
| LCD 引脚 | 树莓派(BCM) |
|---|---|
| VCC | NC |
| 3V3 | 3V3 |
| GND | GND |
| MISO | GPIO 9 |
| MOSI | GPIO 10 |
| SCLK | GPIO 11 |
| LCD_CS | GPIO 8 |
| SD_CS | NC |
| LCD_DC | GPIO 25 |
| LCD_RST | GPIO 27 |
| LCD_BL | GPIO 18 |
| TP_SDA | GPIO 2 |
| TP_SCL | GPIO 3 |
| TP_INT | GPIO 4 |
| TP_RST | GPIO 17 |
开启 SPI 和 I2C 接口
-
在终端中运行配置工具:
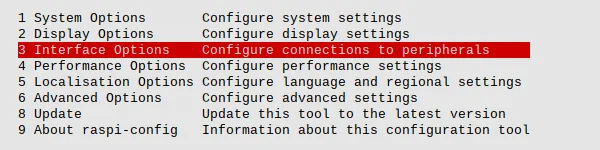
sudo raspi-config在配置界面中选择 "Interface Options":
-
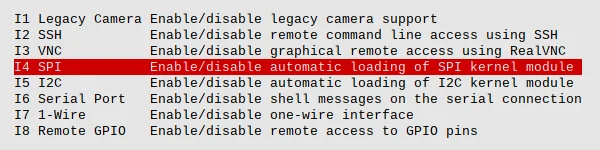
选择 "SPI",然后选择 "Yes" 开启 SPI 接口:

-
再次进入 "Interface Options",选择 "I2C",然后选择 "Yes" 开启 I2C 接口:
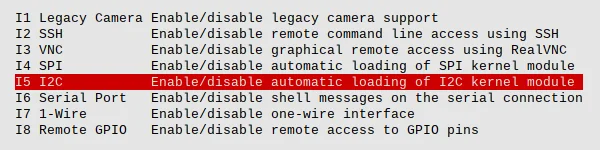

不同 Raspberry Pi OS 版本中的菜单名称可能略有不同。
-
重启树莓派:
sudo reboot -
重启后检查配置:
more /boot/config.txt正常情况下,可看到
dtparam=spi=on和dtparam=i2c_arm=on: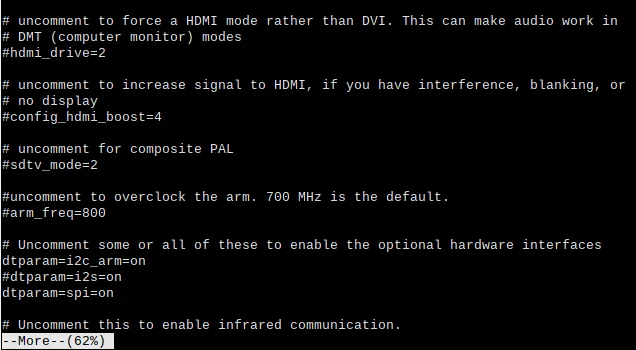
/dev/spidev0.0和/dev/spidev0.1表示 SPI 设备节点已生成:
Python 示例
-
安装运行环境:
sudo apt updatesudo apt install -y python3-pip python3-pil python3-numpy python3-spidev unzip -
下载并解压示例程序:
cd ~wget https://www.waveshare.net/w/upload/a/af/2inch_Capacitive_Touch_LCD_Demo_Pi.zipunzip 2inch_Capacitive_Touch_LCD_Demo_Pi.zip -d 2inch_Capacitive_Touch_LCD -
运行示例:
cd ~/2inch_Capacitive_Touch_LCD/Pythonpython3 2inch_Capacitive_Touch_LCD.py
程序会依次显示 3 张图片,随后进入触控画板界面。
C 示例
-
安装 WiringPi:
git clone https://github.com/WiringPi/WiringPicd WiringPi./buildgpio -v -
如果尚未下载示例程序,请按照 Python 示例 中的下载步骤获取程序包。
-
编译并运行示例:
cd ~/2inch_Capacitive_Touch_LCD/Csudo make cleansudo make -jsudo ./main
程序会进行 RGB 颜色循环测试,随后进入触控画板界面。