Arduino 开发
本章节包含以下部分,请按需阅读:
Arduino 入门教程
初次接触 Arduino ESP32 开发,想要快速上手?我们为您准备了一套通用的 入门教程。
- 第0节 认识 ESP32
- 第1节 安装和配置 Arduino IDE
- 第2节 Arduino 基础知识
- 第3节 数字输出/输入
- 第4节 模拟输入
- 第5节 脉冲宽度调制 (PWM)
- 第6节 串行通信 (UART)
- 第7节 I2C 通信
- 第8节 SPI 通信
- 第9节 Wi-Fi 基础用法
- 第10节 网页服务器
- 第11节 蓝牙 (Bluetooth)
- 第12节 LVGL 图形界面开发
- 第13节 综合项目
请注意:该教程使用 ESP32-S3-Zero 作为教学示例,所有硬件代码均基于其引脚布局。在动手实践前,建议您对照手中的开发板引脚图,确认引脚配置无误。
配置开发环境
1. 安装和配置 Arduino IDE
请参考 安装和配置 Arduino IDE 教程 下载安装 Arduino IDE 并添加 ESP32 支持。
2. 安装库
要运行示例,需要安装对应的库。
可从 此链接 下载 ESP32-S3-LCD-0.85 开发板的示例程序包。包内的 Arduino\libraries 目录已包含本教程所需的全部库文件。
| 库或文件名称 | 说明 | 版本 | 安装方式 |
|---|---|---|---|
| lvgl | LVGL 图形化库 | v8.4.0 或 v9.3.0 | 通过库管理器或手动安装 |
| GFX_Library_for_Arduino | GFX 图形化库 | v1.6.0 | 通过库管理器或手动安装 |
| U8g2 | 图形显示库 | v2.35.30 | 通过库管理器或手动安装 |
| FastLED | RGB 灯驱动库 | v3.10.1 | 通过库管理器或手动安装 |
| ESP32-audioI2S-master | 音频处理库 | v3.4.0 | 通过库管理器或手动安装 |
| OneButton | 按键库 | v2.6.1 | 通过库管理器或手动安装 |
LVGL 及其驱动库的版本之间存在较强的依赖关系。例如,为 LVGL v8 编写的驱动可能不兼容 LVGL v9。为确保示例能够稳定复现,推荐使用上表列出的特定版本。混合使用不同版本的库可能导致编译失败或运行时异常。
安装步骤:
-
解压已下载的 示例程序包。
-
将其
Arduino\libraries目录下的所有文件夹(ESP32-audioI2S-master 、GFX_Library_for_Arduino 等)复制到 Arduino 的库文件夹中。信息Arduino 库文件夹的路径通常是:
c:\Users\<用户名>\Documents\Arduino\libraries。也可以在 Arduino IDE 中通过 文件 > 首选项,查看“项目文件夹位置”来定位。库文件夹就是此路径下的
libraries文件夹。 -
其他安装方式请参考:Arduino 库管理教程。
ESP32-S3-LCD-0.85 所需开发板安装说明
| 板名称 | 板安装要求 | 版本号要求 |
|---|---|---|
| ESP32 by Espressif Systems | “离线”安装/“在线”安装 | 3.2.0 |
3. 其他提示
ESP32-S3-LCD-0.85 需要选择及配置开发板。

- ESP32-S3-LCD-0.85 需要选择 ESP32S3 Dev Module。
- 选择 USB 端口
- ESP32-S3-LCD-0.85 使用 ESP32-S3 原生 USB 接口,而非 UART 转 USB。对于串口通信:
-
printf()函数可直接使用; -
若要使用
Serial.println()函数,需要额外配置:在 IDE 工具菜单中启用"USB CDC On Boot"选项,或在代码中声明 HWCDC 对象处理 USB 串口通信。
-
- 选择 8MB flash
- 选择合适大小的分区表
示例程序
Arduino 示例程序位于 示例程序包 的 Arduino/examples 目录中。
| 示例程序 | 基础例程说明 | 依赖库 |
|---|---|---|
| 01_audio_out | 读取 SD 卡的音频文件,并播放 | ESP32-audioI2S-master |
| 02_button_example | 按键测试 | OneButton |
| 03_ws2812b_example | 测试 RGB 灯 | FastLED |
| 04_gfx_helloworld | 屏幕上显示 HelloWorld | GFX_Library_for_Arduino |
| 05_esp_wifi_analyzer | 屏幕上显示 WiFi 信号强度 | GFX_Library_for_Arduino |
| 06_gfx_u8g2_font | 通过加载字库,实现各国文字显示 | GFX_Library_for_Arduino、U8g2 |
| 07_sd_card_test | 测试 SD 卡的读写 | --- |
| 08_lvgl_example_v8 | lvgl v8.4.0 示例程序 | GFX_Library_for_Arduino、lvgl |
| 09_lvgl_example_v9 | lvgl v9.3.0 示例程序 | GFX_Library_for_Arduino、lvgl |
01_audio_out
本示例演示 ESP32-S3-LCD-0.85 读取 SD 卡的音频文件并使用喇叭播放,屏幕无现象,支持 MP3、AAC、WAV 等格式。
代码
01_audio_out.ino
#include "Arduino.h"
#include "WiFiMulti.h"
#include "Audio.h"
#include "SD_MMC.h"
#include "FS.h"

#include "es8311.h"
#include "esp_check.h"
#include "Wire.h"

#define PA_CTRL 7
#define I2S_MCLK 8
#define I2S_BCLK 9
#define I2S_DOUT 12
#define I2S_LRC 10

#define I2C_SDA 42
#define I2C_SCL 41

#define EXAMPLE_SAMPLE_RATE (16000)
#define EXAMPLE_MCLK_MULTIPLE (256)  // If not using 24-bit data width, 256 should be enough
#define EXAMPLE_MCLK_FREQ_HZ (EXAMPLE_SAMPLE_RATE * EXAMPLE_MCLK_MULTIPLE)
#define EXAMPLE_VOICE_VOLUME (75)

Audio audio;
WiFiMulti wifiMulti;
// #define ENABLE_WIFI
String ssid = "waveshare";
String password = "12345678";

int clk = 16;
int cmd = 15;
int d0 = 17;
int d1 = 18;
int d2 = 13;
int d3 = 14;

static esp_err_t es8311_codec_init(void) {

  es8311_handle_t es_handle = es8311_create(I2C_NUM_0, ES8311_ADDRRES_0);
  ESP_RETURN_ON_FALSE(es_handle, ESP_FAIL, TAG, "es8311 create failed");
  const es8311_clock_config_t es_clk = {
    .mclk_inverted = false,
    .sclk_inverted = false,
    .mclk_from_mclk_pin = true,
    .mclk_frequency = EXAMPLE_MCLK_FREQ_HZ,
    .sample_frequency = EXAMPLE_SAMPLE_RATE
  };

  ESP_ERROR_CHECK(es8311_init(es_handle, &es_clk, ES8311_RESOLUTION_16, ES8311_RESOLUTION_16));
  ESP_RETURN_ON_ERROR(es8311_sample_frequency_config(es_handle, EXAMPLE_SAMPLE_RATE * EXAMPLE_MCLK_MULTIPLE, EXAMPLE_SAMPLE_RATE), TAG, "set es8311 sample frequency failed");
  ESP_RETURN_ON_ERROR(es8311_voice_volume_set(es_handle, EXAMPLE_VOICE_VOLUME, NULL), TAG, "set es8311 volume failed");
  ESP_RETURN_ON_ERROR(es8311_microphone_config(es_handle, false), TAG, "set es8311 microphone failed");

  return ESP_OK;
}

void setup() {
  Serial.begin(115200);
  Wire.begin(I2C_SDA, I2C_SCL);
  pinMode(PA_CTRL, OUTPUT);
  digitalWrite(PA_CTRL, HIGH);
  es8311_codec_init();
  if (!SD_MMC.setPins(clk, cmd, d0, d1, d2, d3)) {
    Serial.println("Pin change failed!");
    return;
  }
  if (!SD_MMC.begin()) {
    Serial.println("Card Mount Failed");
    return;
  }
#ifdef ENABLE_WIFI
  WiFi.mode(WIFI_STA);
  wifiMulti.addAP(ssid.c_str(), password.c_str());
  wifiMulti.run();
  if (WiFi.status() != WL_CONNECTED) {
    WiFi.disconnect(true);
    wifiMulti.run();
  }
#endif
  audio.setPinout(I2S_BCLK, I2S_LRC, I2S_DOUT, I2S_MCLK);
  audio.setVolume(21);  // 0...21

#ifdef ENABLE_WIFI
  //  audio.connecttohost("http://www.wdr.de/wdrlive/media/einslive.m3u");
  //  audio.connecttohost("http://somafm.com/wma128/missioncontrol.asx"); //  asx
  //  audio.connecttohost("http://mp3.ffh.de/radioffh/hqlivestream.aac"); //  128k aac
  //  audio.connecttohost("http://mp3.ffh.de/radioffh/hqlivestream.mp3"); //  128k mp3
#else
  audio.connecttoFS(SD_MMC, "music/1.mp3");
#endif
}

void loop() {
  vTaskDelay(1);
  audio.loop();
  if (Serial.available()) {  // put streamURL in serial monitor
    audio.stopSong();
    String r = Serial.readString();
    r.trim();
    if (r.length() > 5) audio.connecttohost(r.c_str());
    log_i("free heap=%i", ESP.getFreeHeap());
  }
}

// optional
void audio_info(const char *info) {
  Serial.print("info        ");
  Serial.println(info);
}
void audio_id3data(const char *info) {  //id3 metadata
  Serial.print("id3data     ");
  Serial.println(info);
}
void audio_eof_mp3(const char *info) {  //end of file
  Serial.print("eof_mp3     ");
  Serial.println(info);
}
void audio_showstation(const char *info) {
  Serial.print("station     ");
  Serial.println(info);
}
void audio_showstreamtitle(const char *info) {
  Serial.print("streamtitle ");
  Serial.println(info);
}
void audio_bitrate(const char *info) {
  Serial.print("bitrate     ");
  Serial.println(info);
}
void audio_commercial(const char *info) {  //duration in sec
  Serial.print("commercial  ");
  Serial.println(info);
}
void audio_icyurl(const char *info) {  //homepage
  Serial.print("icyurl      ");
  Serial.println(info);
}
void audio_lasthost(const char *info) {  //stream URL played
  Serial.print("lasthost    ");
  Serial.println(info);
}
代码解释
-
初始化 SD 卡:
if (!SD_MMC.setPins(clk, cmd, d0, d1, d2, d3)) {Serial.println("Pin change failed!");return;}if (!SD_MMC.begin()) {Serial.println("Card Mount Failed");return;} -
设置 I2S 引脚和音量大小:
audio.setPinout(I2S_BCLK, I2S_LRC, I2S_DOUT, I2S_MCLK);audio.setVolume(21); // 0...21 -
设置播放的音频文件:
audio.connecttoFS(SD_MMC, "music/1.mp3");
运行效果
- 播放音频文件,屏幕无现象
02_button_example
本示例演示如何使用 OneButton 库读取按键的单击、双击和长按等状态,并通过串口打印。
代码
02_button_example.ino
#include "OneButton.h"
#define PIN_INPUT1 0
#define PIN_INPUT2 5
#define PIN_INPUT3 4
// Setup a new OneButton on pin PIN_INPUT1.
OneButton button1(PIN_INPUT1, true);
// Setup a new OneButton on pin PIN_INPUT2.
OneButton button2(PIN_INPUT2, true);
// Setup a new OneButton on pin PIN_INPUT3.
OneButton button3(PIN_INPUT3, true);
// setup code here, to run once:
void setup() {
// Setup the Serial port. see https://docs.arduino.cc/language-reference/en/functions/communication/serial/ifSerial/
Serial.begin(115200);
while (!Serial) {
; // wait for serial port to connect. Needed for Leonardo only
}
// link the button 1 functions.
button1.attachClick(click1);
button1.attachDoubleClick(doubleclick1);
button1.attachLongPressStart(longPressStart1);
button1.attachLongPressStop(longPressStop1);
button1.attachDuringLongPress(longPress1);
// link the button 2 functions.
button2.attachClick(click2);
button2.attachDoubleClick(doubleclick2);
button2.attachLongPressStart(longPressStart2);
button2.attachLongPressStop(longPressStop2);
button2.attachDuringLongPress(longPress2);
// link the button 3 functions.
button3.attachClick(click3);
button3.attachDoubleClick(doubleclick3);
button3.attachLongPressStart(longPressStart3);
button3.attachLongPressStop(longPressStop3);
button3.attachDuringLongPress(longPress3);
} // setup
// main code here, to run repeatedly:
void loop() {
// keep watching the push buttons:
button1.tick();
button2.tick();
button3.tick();
// You can implement other code in here or just wait a while
delay(10);
} // loop
// ----- button 1 callback functions
// This function will be called when the button1 was pressed 1 time (and no 2. button press followed).
void click1() {
Serial.println("Button 1 click.");
} // click1
// This function will be called when the button1 was pressed 2 times in a short timeframe.
void doubleclick1() {
Serial.println("Button 1 doubleclick.");
} // doubleclick1
// This function will be called once, when the button1 is pressed for a long time.
void longPressStart1() {
Serial.println("Button 1 longPress start");
} // longPressStart1
// This function will be called often, while the button1 is pressed for a long time.
void longPress1() {
Serial.println("Button 1 longPress...");
} // longPress1
// This function will be called once, when the button1 is released after beeing pressed for a long time.
void longPressStop1() {
Serial.println("Button 1 longPress stop");
} // longPressStop1
// ... and the same for button 2:
void click2() {
Serial.println("Button 2 click.");
} // click2
void doubleclick2() {
Serial.println("Button 2 doubleclick.");
} // doubleclick2
void longPressStart2() {
Serial.println("Button 2 longPress start");
} // longPressStart2
void longPress2() {
Serial.println("Button 2 longPress...");
} // longPress2
void longPressStop2() {
Serial.println("Button 2 longPress stop");
} // longPressStop2
// ... and the same for button 3:
void click3() {
Serial.println("Button 3 click.");
} // click3
void doubleclick3() {
Serial.println("Button 3 doubleclick.");
} // doubleclick3
void longPressStart3() {
Serial.println("Button 3 longPress start");
} // longPressStart3
void longPress3() {
Serial.println("Button 3 longPress...");
} // longPress3
void longPressStop3() {
Serial.println("Button 3 longPress stop");
} // longPressStop3
// End
代码解释
-
绑定回调函数:
button1.attachClick(click1);button1.attachDoubleClick(doubleclick1);button1.attachLongPressStart(longPressStart1);button1.attachLongPressStop(longPressStop1);button1.attachDuringLongPress(longPress1);
运行效果
- 屏幕无现象
- 串口打印按钮信息

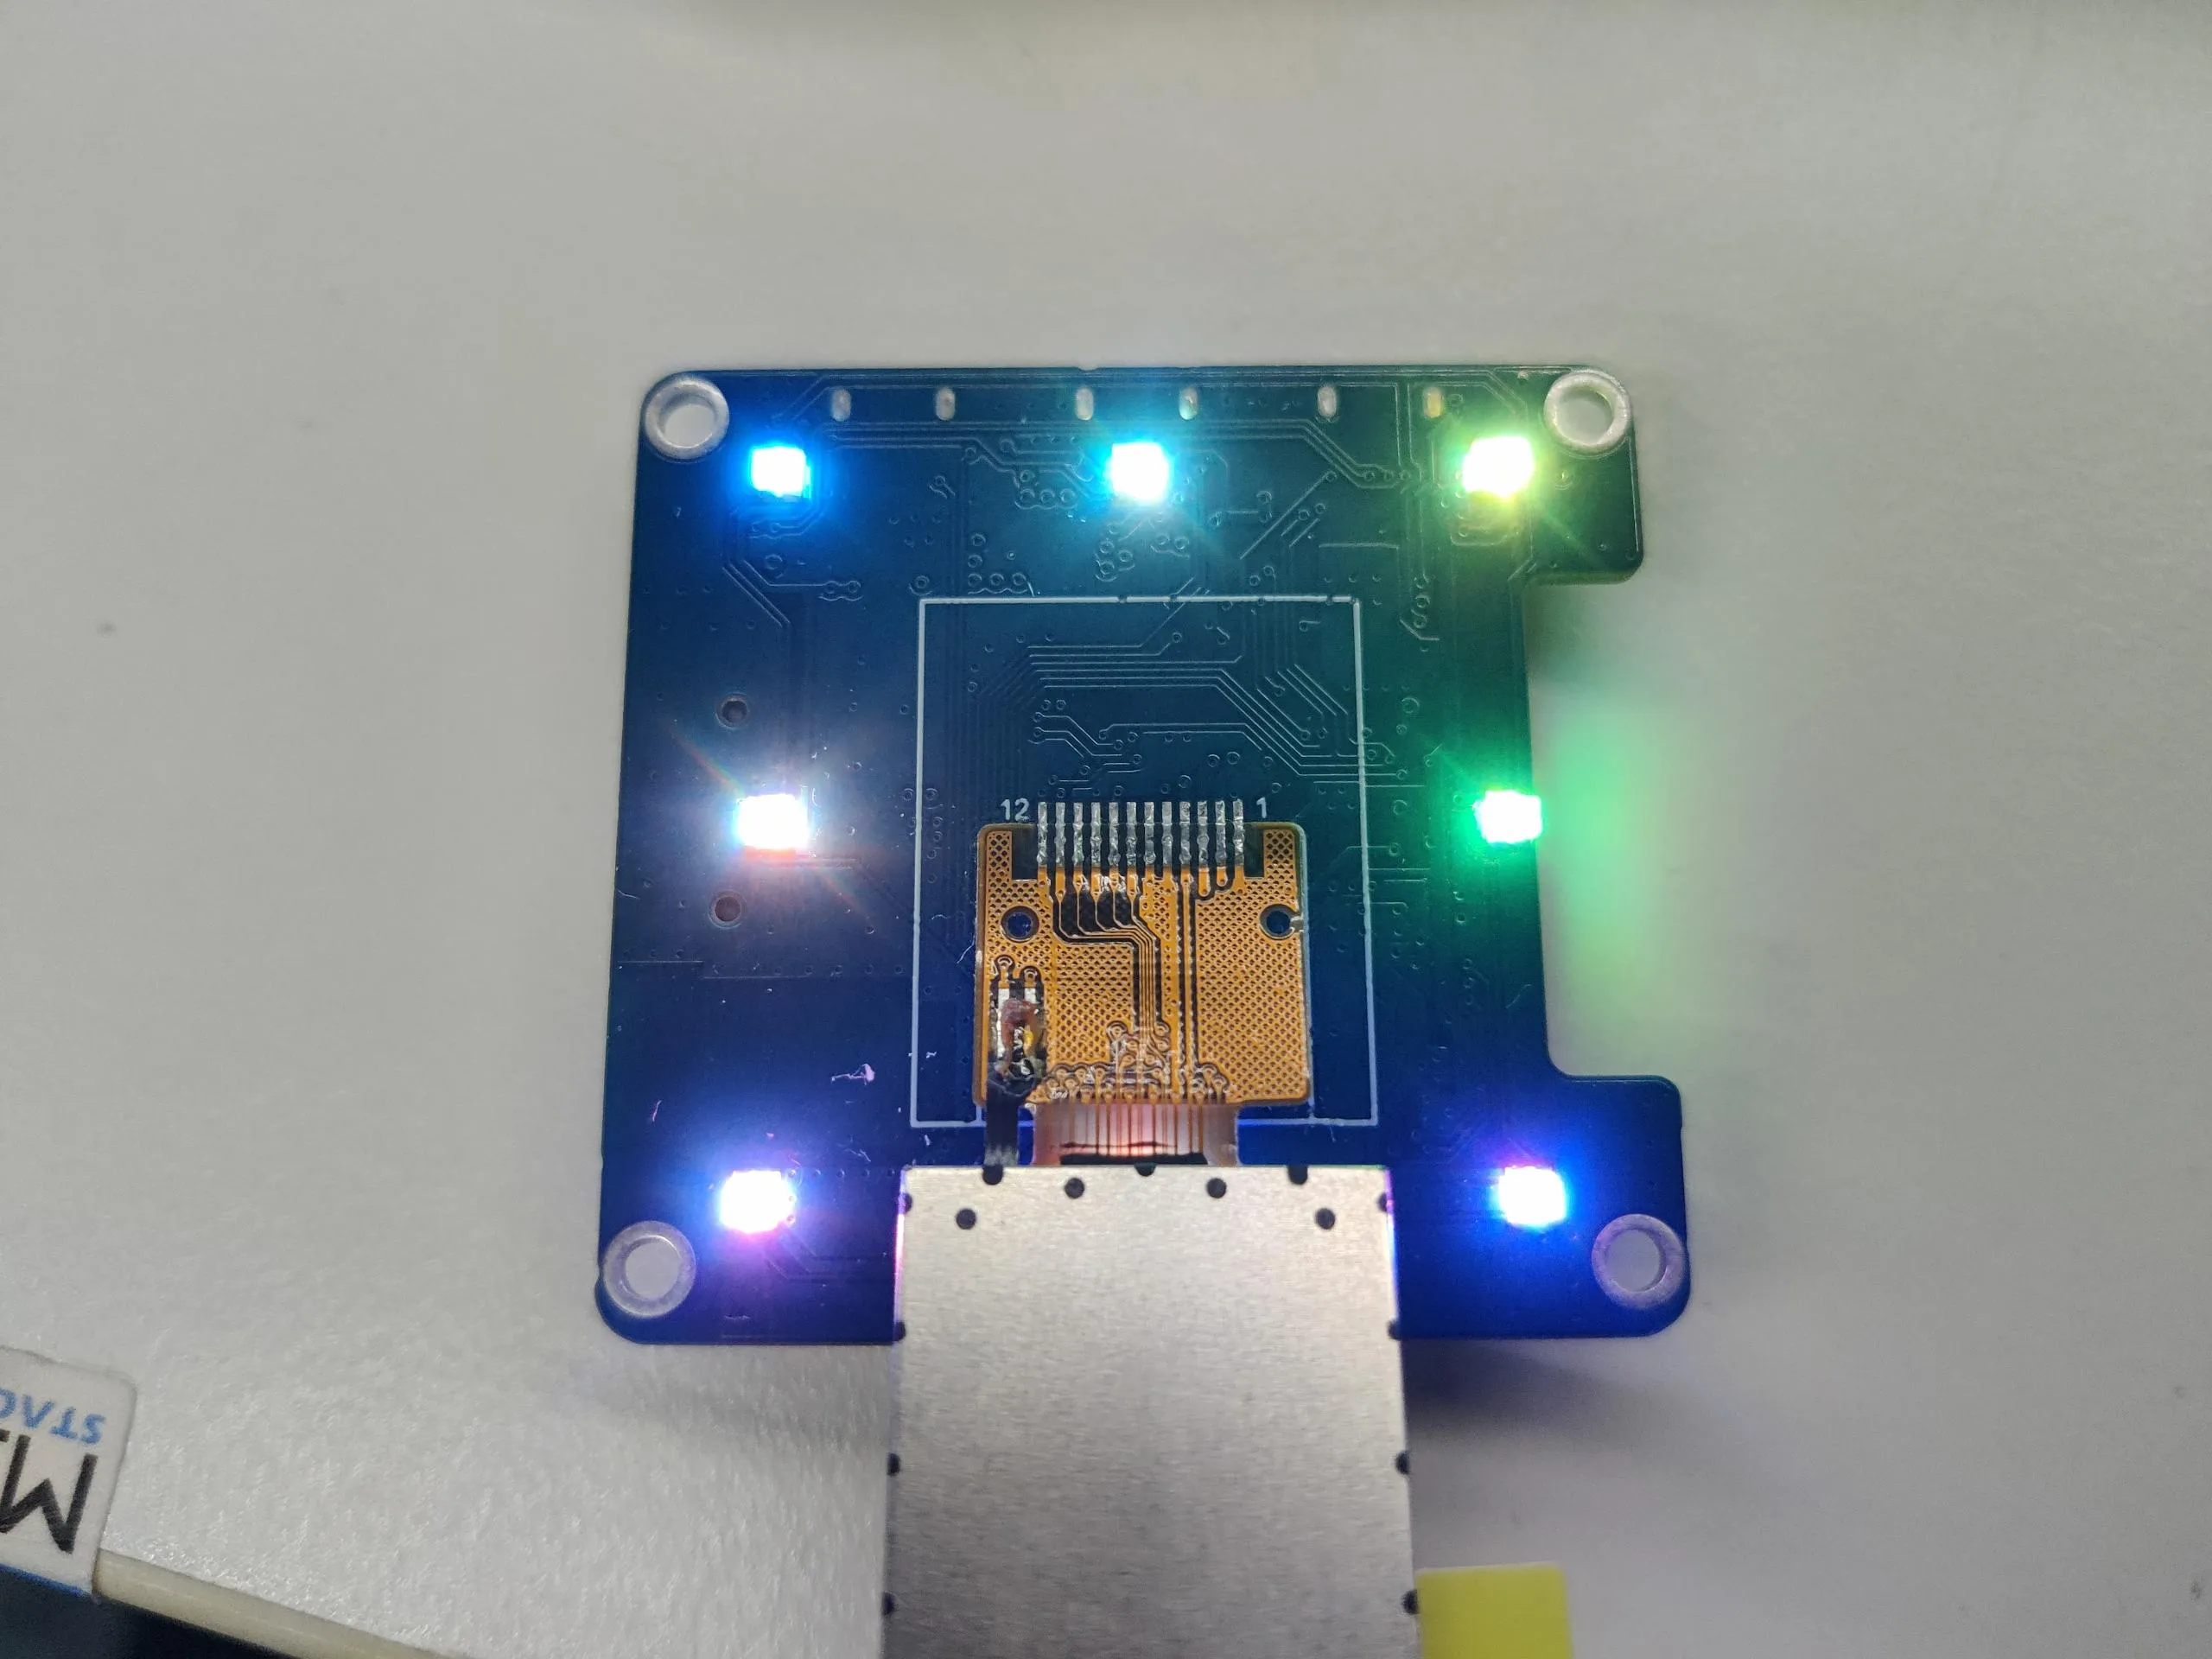
03_ws2812b_example
本示例 ESP32-S3-LCD-0.85 使用 FastLED 驱动 sw2812b RGB 灯,每 500ms 切换一种随机的颜色
代码
03_ws2812b_example.ino
#include <FastLED.h>
// How many leds in your strip?
#define NUM_LEDS 8
#define DATA_PIN 48
// Define the array of leds
CRGB leds[NUM_LEDS];
void setup() {
FastLED.addLeds<WS2812B, DATA_PIN, RGB>(leds, NUM_LEDS); // GRB ordering is typical
FastLED.setBrightness(100); // 0-255
for(int i = 0; i < NUM_LEDS; i++){
leds[i] = CRGB::Red;
}
FastLED.show();
delay(2000);
}
void loop() {
for(int i = 0; i < NUM_LEDS; i++){
leds[i] = random(0xffffff);
}
FastLED.show();
delay(500);
}
代码解释
-
初始化 ws2812b, 并设置亮度:
FastLED.addLeds<WS2812B, DATA_PIN, RGB>(leds, NUM_LEDS); // GRB ordering is typicalFastLED.setBrightness(100); // 0-255
运行效果
- 屏幕无现象
- RGB 灯每 500ms 切换一种随机的颜色
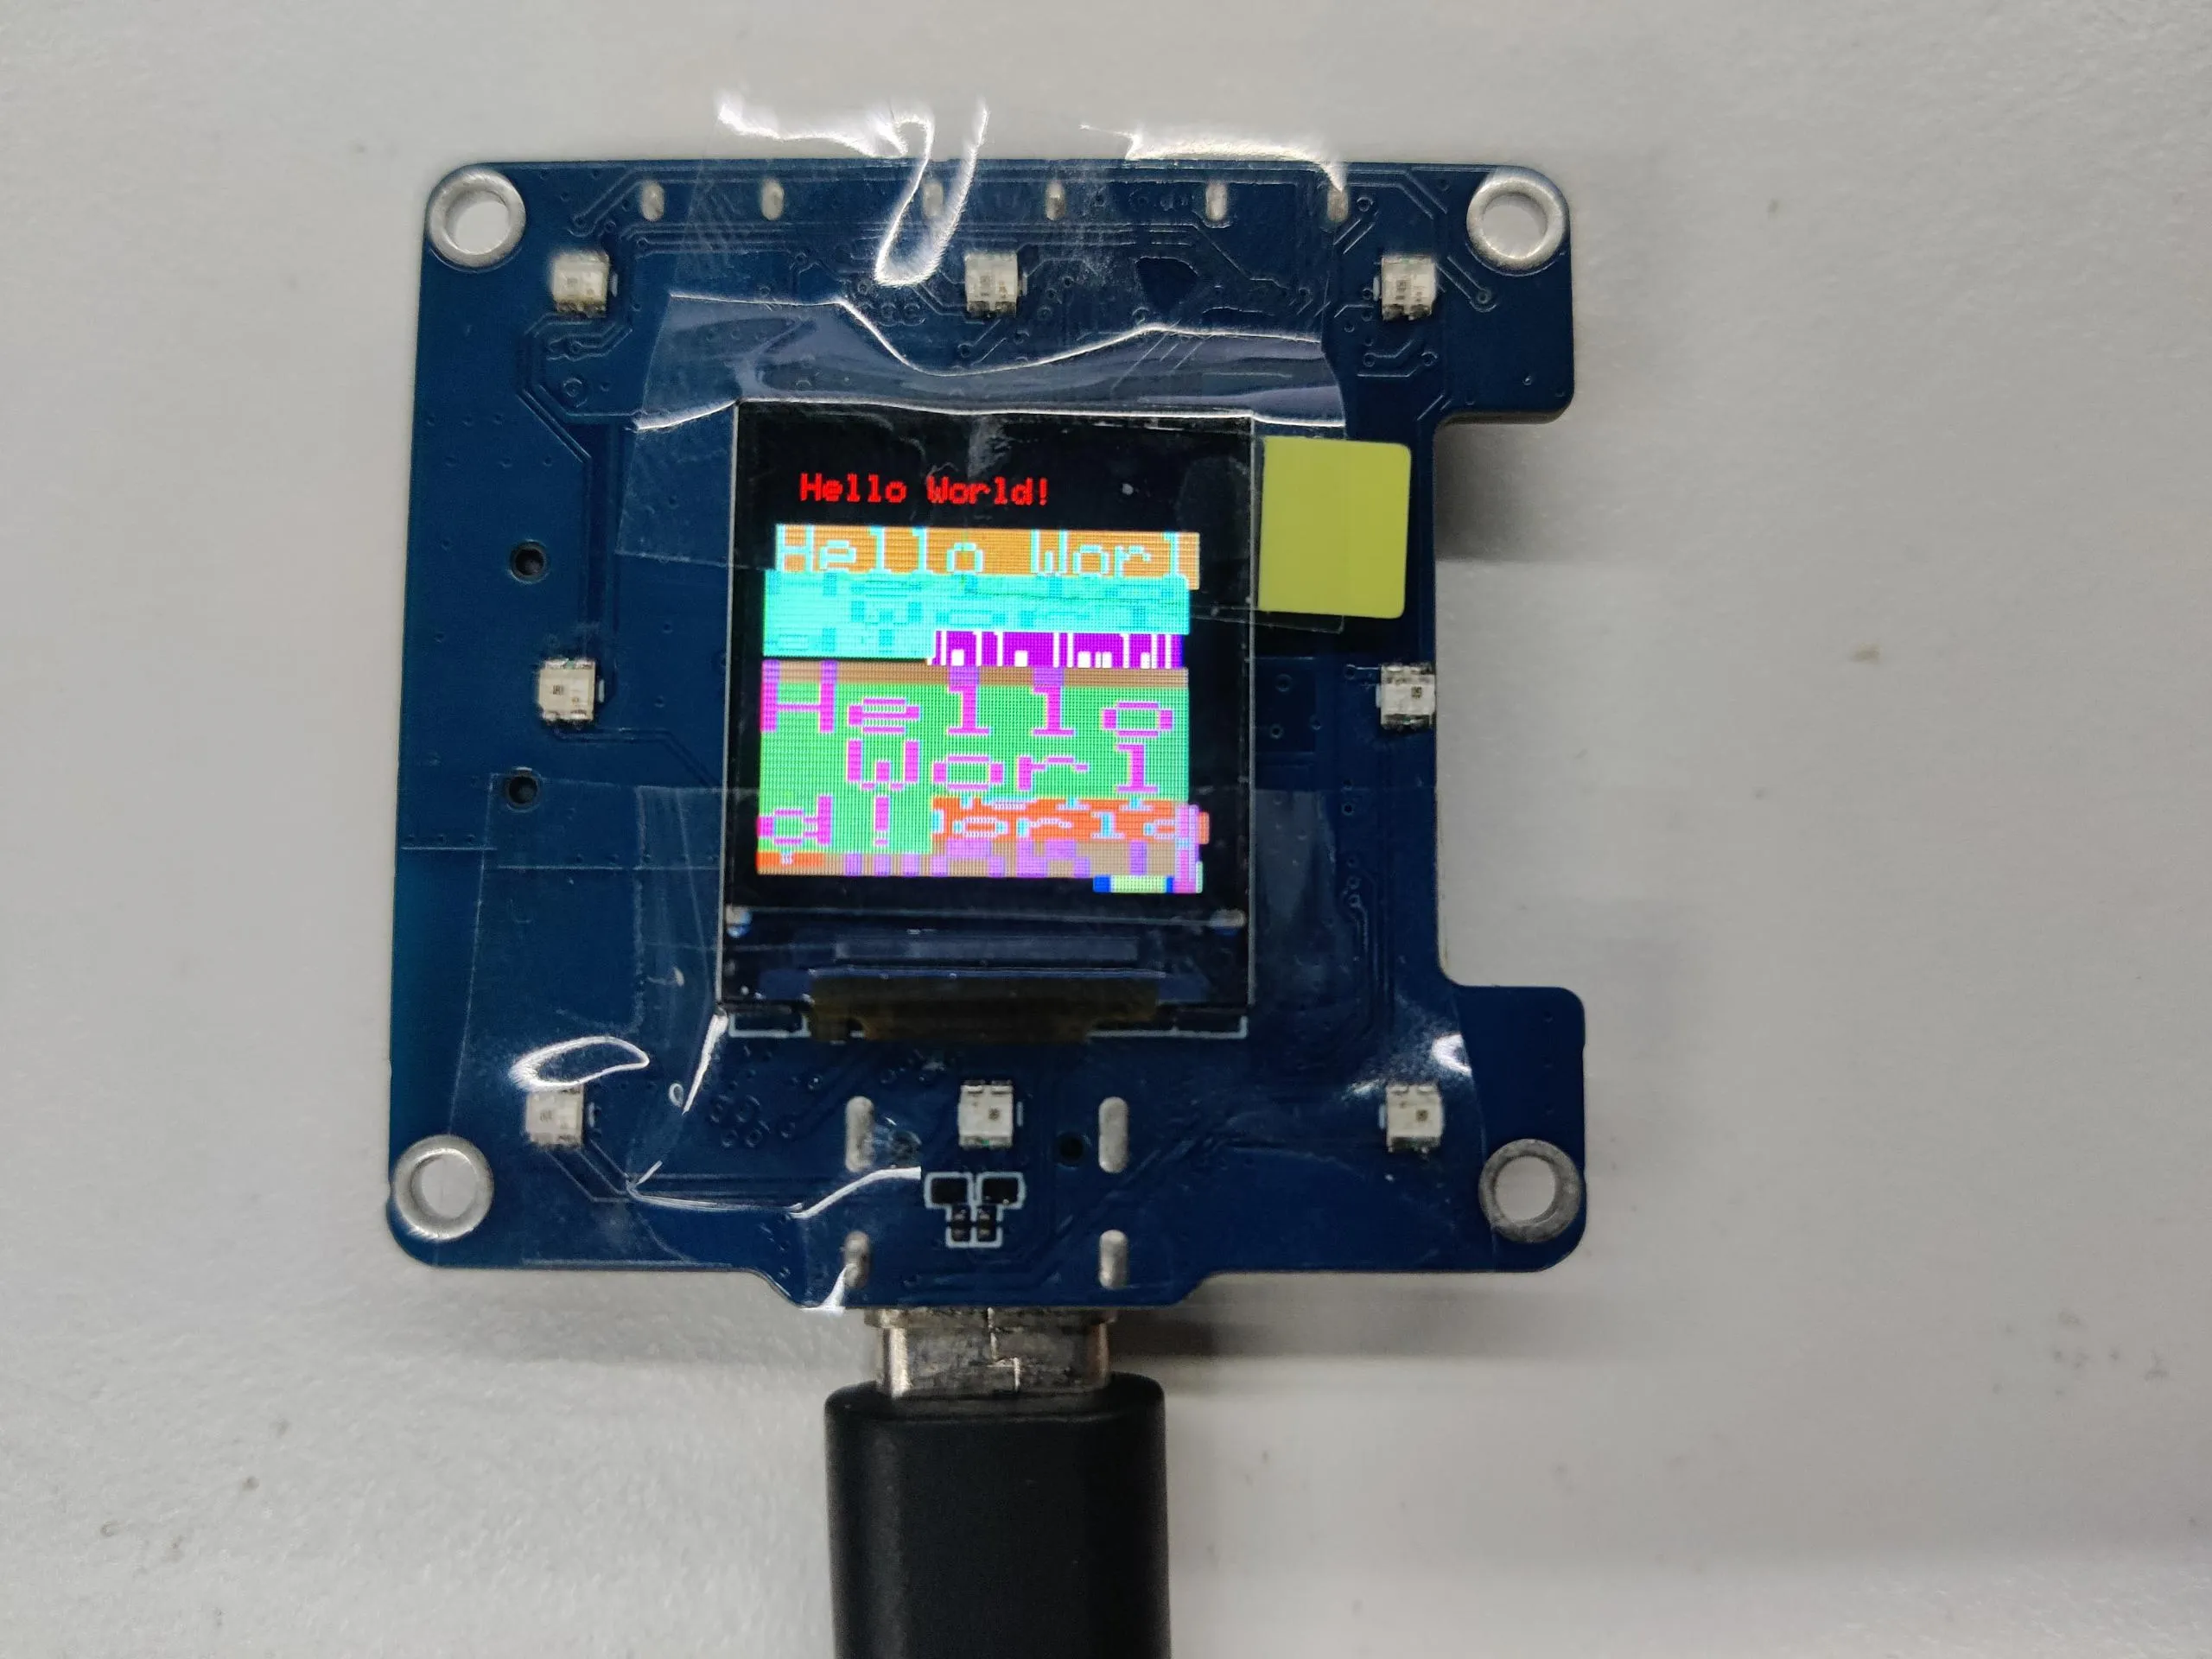
04_gfx_helloworld
本示例演示 ESP32-S3-LCD-0.85 使用 GFX_Library_for_Arduino 库驱动屏幕并在屏幕上显示 HelloWorld
代码
04_gfx_helloworld.ino
#include <Arduino_GFX_Library.h>
#define GFX_BL 46 // default backlight pin, you may replace DF_GFX_BL to actual backlight pin
/* More data bus class: https://github.com/moononournation/Arduino_GFX/wiki/Data-Bus-Class */
Arduino_DataBus *bus = new Arduino_ESP32SPI(45 /* DC */, 21 /* CS */, 38 /* SCK */, 39 /* MOSI */, GFX_NOT_DEFINED /* MISO */);
/* More display class: https://github.com/moononournation/Arduino_GFX/wiki/Display-Class */
Arduino_GFX *gfx = new Arduino_GC9107(bus, 40 /* RST */, 0 /* rotation */, true /* IPS */);
void setup(void)
{
#ifdef DEV_DEVICE_INIT
DEV_DEVICE_INIT();
#endif
Serial.begin(115200);
// Serial.setDebugOutput(true);
// while(!Serial);
Serial.println("Arduino_GFX Hello World example");
// Init Display
if (!gfx->begin())
{
Serial.println("gfx->begin() failed!");
}
gfx->fillScreen(RGB565_BLACK);
#ifdef GFX_BL
pinMode(GFX_BL, OUTPUT);
digitalWrite(GFX_BL, HIGH);
#endif
gfx->setCursor(10, 10);
gfx->setTextColor(RGB565_RED);
gfx->println("Hello World!");
delay(5000); // 5 seconds
}
void loop()
{
gfx->setCursor(random(gfx->width()), random(gfx->height()));
gfx->setTextColor(random(0xffff), random(0xffff));
gfx->setTextSize(random(6) /* x scale */, random(6) /* y scale */, random(2) /* pixel_margin */);
gfx->println("Hello World!");
delay(1000); // 1 second
}
代码解释
-
配置屏幕接口、分辨率等
Arduino_DataBus* bus = new Arduino_ESP32SPI(45 /* DC */, 21 /* CS */, 38 /* SCK */, 39 /* MOSI */, -1 /* MISO */);Arduino_GFX* gfx = new Arduino_GC9107(bus, 40 /* RST */, 0 /* rotation */, true, 240, 240);
运行效果
- 屏幕显示
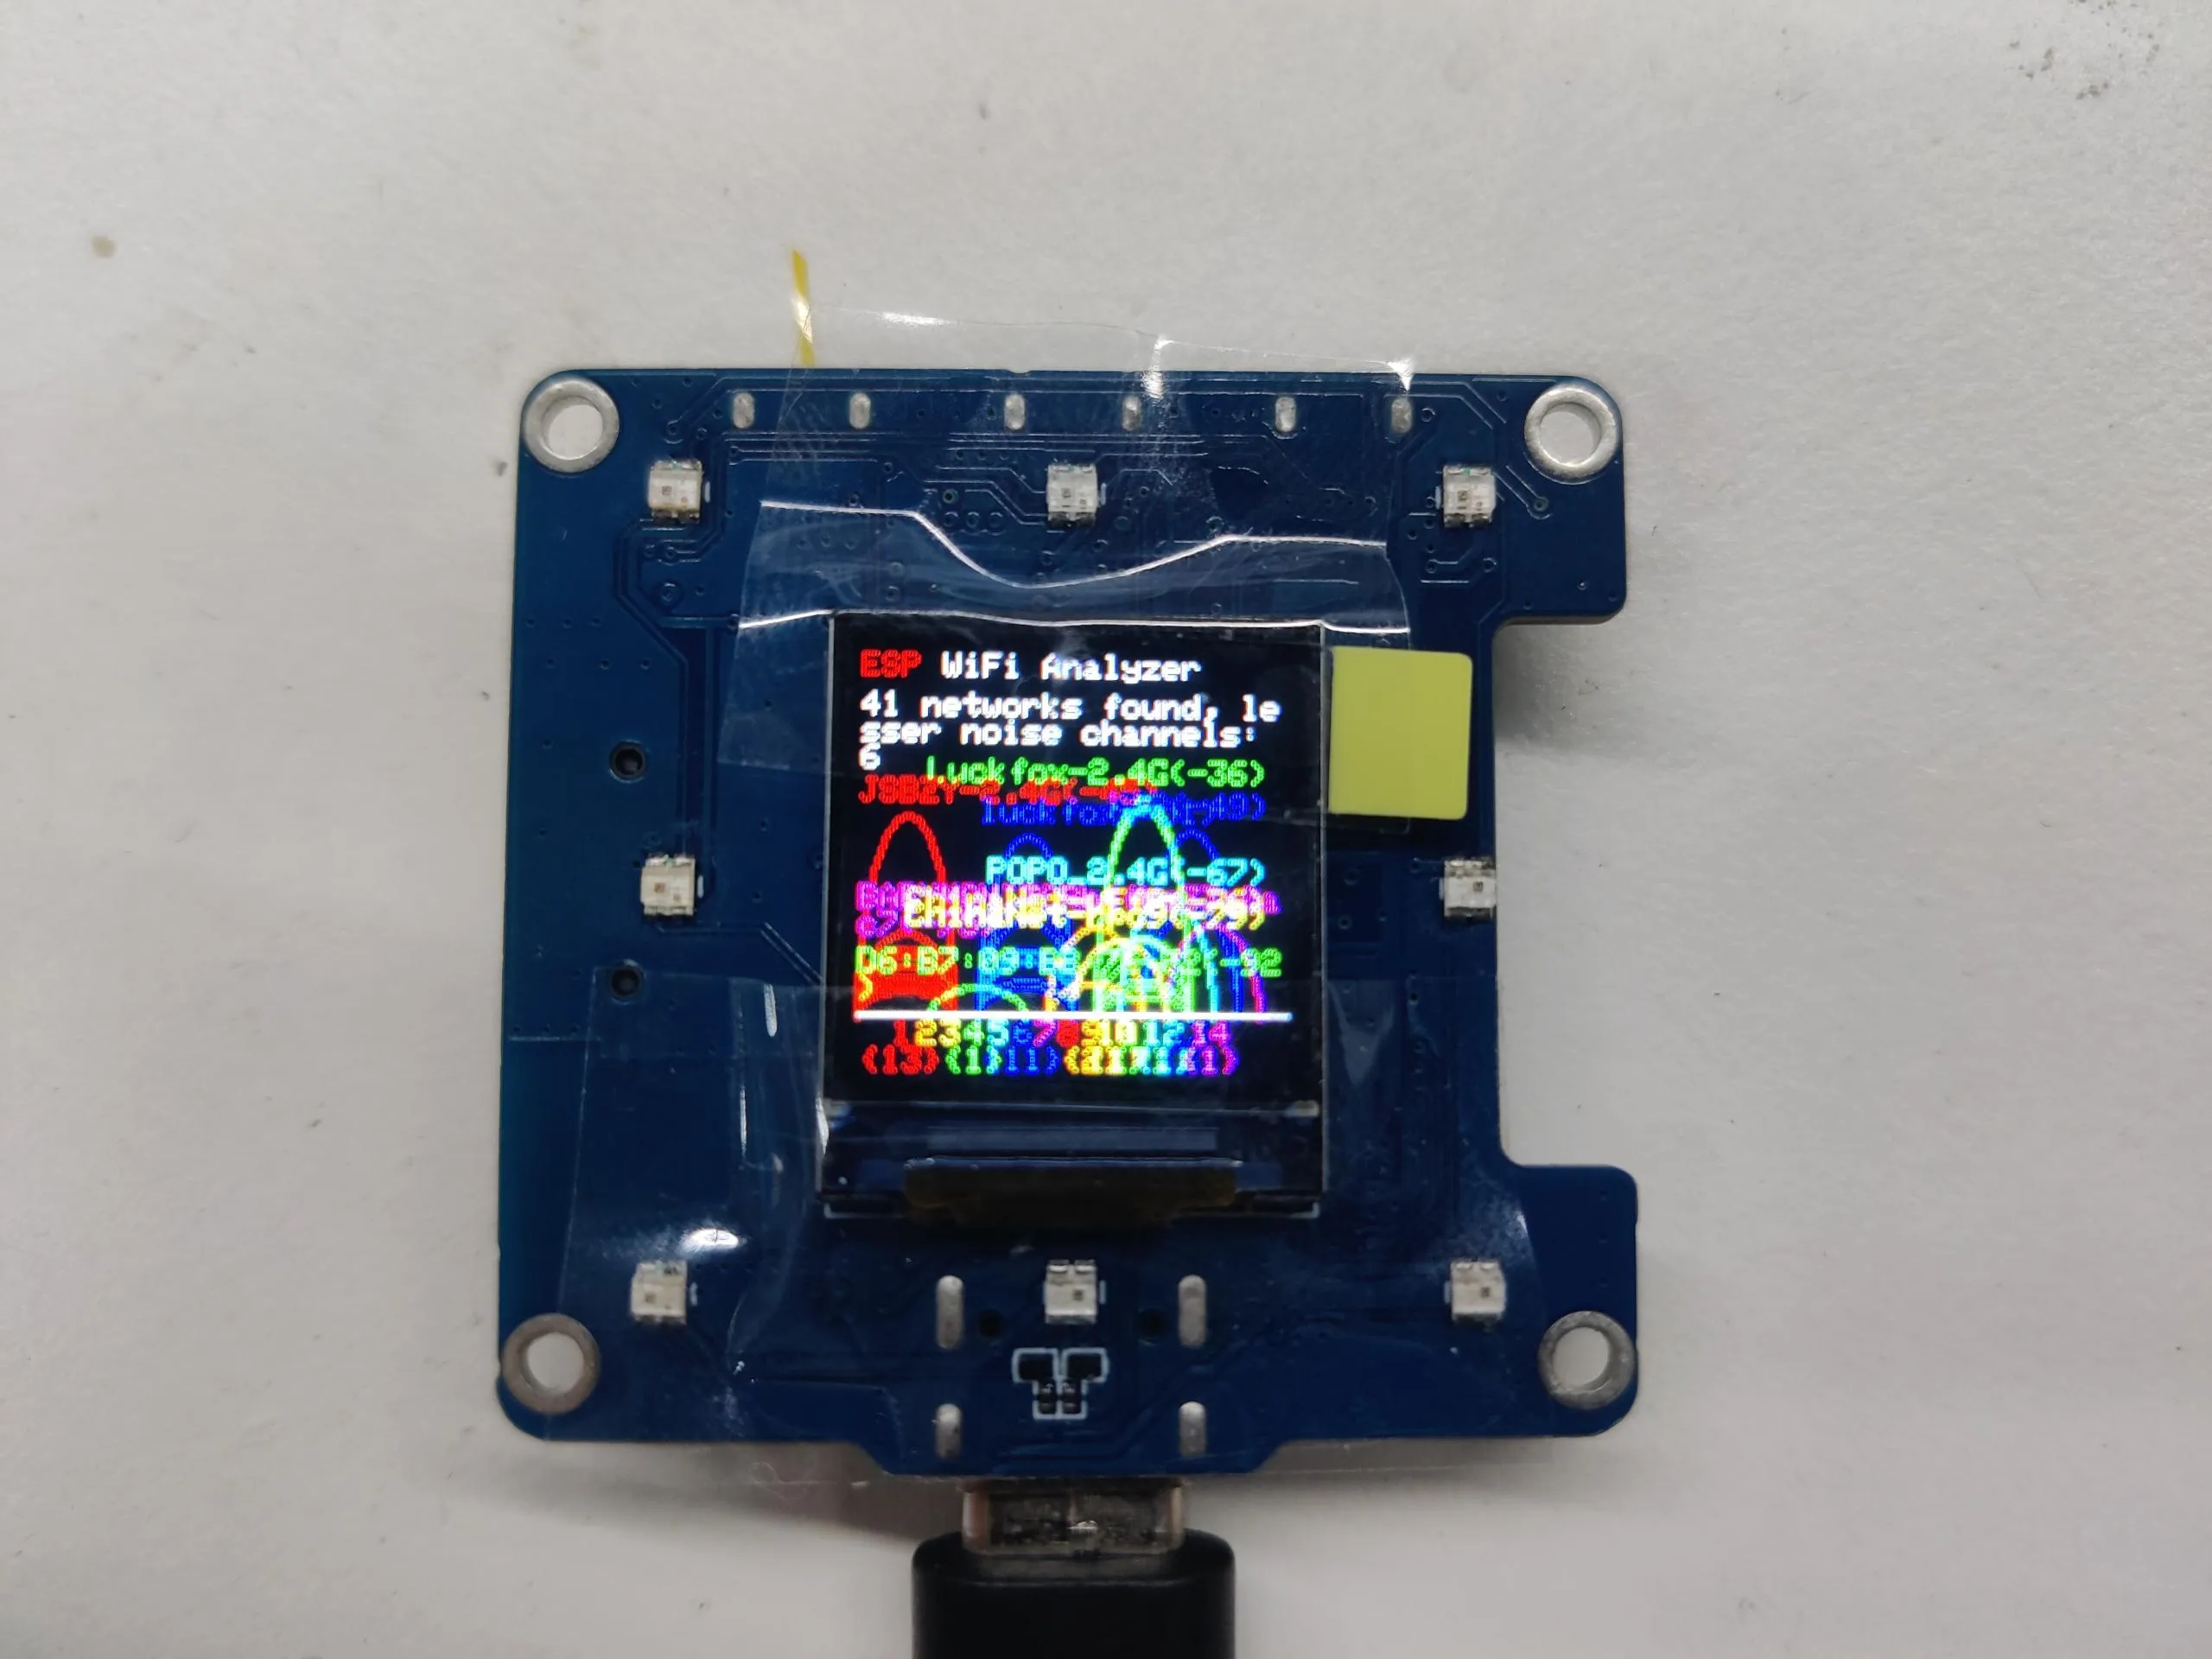
05_esp_wifi_analyzer
本示例演示 ESP32-S3-LCD-0.85 使用 GFX_Library_for_Arduino 库显示 WiFi 频段信号强度
代码
05_esp_wifi_analyzer.ino
/*
* ESP WiFi Analyzer
* Require ESP8266/ESP32 board support.
*/
// POWER SAVING SETTING
#define SCAN_INTERVAL 3000
// #define SCAN_COUNT_SLEEP 3
// #define LCD_PWR_PIN 14
#include <Arduino_GFX_Library.h>
#define GFX_BL 46 // default backlight pin, you may replace DF_GFX_BL to actual backlight pin
/* More data bus class: https://github.com/moononournation/Arduino_GFX/wiki/Data-Bus-Class */
Arduino_DataBus *bus = new Arduino_ESP32SPI(45 /* DC */, 21 /* CS */, 38 /* SCK */, 39 /* MOSI */, GFX_NOT_DEFINED /* MISO */);
/* More display class: https://github.com/moononournation/Arduino_GFX/wiki/Display-Class */
Arduino_GFX *gfx = new Arduino_GC9107(bus, 40 /* RST */, 0 /* rotation */, true /* IPS */);
#if defined(ESP32)
#include "WiFi.h"
#else
#include "ESP8266WiFi.h"
#define log_i(format, ...) Serial.printf(format, ##__VA_ARGS__)
#endif
int16_t w, h, text_size, banner_height, graph_baseline, graph_height, channel_width, signal_width;
// RSSI RANGE
#define RSSI_CEILING -40
#define RSSI_FLOOR -100
// Channel color mapping from channel 1 to 14
uint16_t channel_color[] = {
RGB565_RED, RGB565_ORANGE, RGB565_YELLOW, RGB565_GREEN, RGB565_CYAN, RGB565_BLUE, RGB565_MAGENTA,
RGB565_RED, RGB565_ORANGE, RGB565_YELLOW, RGB565_GREEN, RGB565_CYAN, RGB565_BLUE, RGB565_MAGENTA};
uint8_t scan_count = 0;
void setup()
{
#ifdef DEV_DEVICE_INIT
DEV_DEVICE_INIT();
#endif
Serial.begin(115200);
// Serial.setDebugOutput(true);
// while(!Serial);
Serial.println("Arduino_GFX ESP WiFi Analyzer example");
// Set WiFi to station mode and disconnect from an AP if it was previously connected
WiFi.mode(WIFI_STA);
WiFi.disconnect();
delay(100);
#if defined(LCD_PWR_PIN)
pinMode(LCD_PWR_PIN, OUTPUT); // sets the pin as output
digitalWrite(LCD_PWR_PIN, HIGH); // power on
#endif
#ifdef GFX_BL
pinMode(GFX_BL, OUTPUT);
digitalWrite(GFX_BL, HIGH);
#endif
// Init Display
if (!gfx->begin())
{
Serial.println("gfx->begin() failed!");
}
w = gfx->width();
h = gfx->height();
text_size = (h < 200) ? 1 : 2;
banner_height = text_size * 3 * 4;
graph_baseline = h - 20; // minus 2 text lines
graph_height = graph_baseline - banner_height - 30; // minus 3 text lines
channel_width = w / 17;
signal_width = channel_width * 2;
// init banner
gfx->setTextSize(text_size);
gfx->fillScreen(RGB565_BLACK);
gfx->setTextColor(RGB565_RED);
gfx->setCursor(0, 0);
gfx->print("ESP");
gfx->setTextColor(RGB565_WHITE);
gfx->print(" WiFi Analyzer");
#ifdef CANVAS
gfx->flush();
#endif
}
bool matchBssidPrefix(uint8_t *a, uint8_t *b)
{
for (uint8_t i = 0; i < 5; i++)
{ // only compare first 5 bytes
if (a[i] != b[i])
{
return false;
}
}
return true;
}
void loop()
{
uint8_t ap_count_list[] = {0, 0, 0, 0, 0, 0, 0, 0, 0, 0, 0, 0, 0, 0};
int32_t noise_list[] = {RSSI_FLOOR, RSSI_FLOOR, RSSI_FLOOR, RSSI_FLOOR, RSSI_FLOOR, RSSI_FLOOR, RSSI_FLOOR, RSSI_FLOOR, RSSI_FLOOR, RSSI_FLOOR, RSSI_FLOOR, RSSI_FLOOR, RSSI_FLOOR, RSSI_FLOOR};
int32_t peak_list[] = {RSSI_FLOOR, RSSI_FLOOR, RSSI_FLOOR, RSSI_FLOOR, RSSI_FLOOR, RSSI_FLOOR, RSSI_FLOOR, RSSI_FLOOR, RSSI_FLOOR, RSSI_FLOOR, RSSI_FLOOR, RSSI_FLOOR, RSSI_FLOOR, RSSI_FLOOR};
int16_t peak_id_list[] = {-1, -1, -1, -1, -1, -1, -1, -1, -1, -1, -1, -1, -1, -1};
int32_t channel;
int16_t idx;
int32_t rssi;
uint8_t *bssid;
String ssid;
uint16_t color;
int16_t height, offset, text_width;
// WiFi.scanNetworks will return the number of networks found
#if defined(ESP32)
int n = WiFi.scanNetworks(false /* async */, true /* show_hidden */, true /* passive */, 500 /* max_ms_per_chan */);
#else
int n = WiFi.scanNetworks(false /* async */, true /* show_hidden */);
#endif
// clear old graph
gfx->fillRect(0, banner_height, w, h - banner_height, RGB565_BLACK);
gfx->setTextSize(1);
if (n == 0)
{
gfx->setTextColor(RGB565_WHITE);
gfx->setCursor(0, banner_height);
gfx->println("no networks found");
}
else
{
for (int i = 0; i < n; i++)
{
channel = WiFi.channel(i);
idx = channel - 1;
rssi = WiFi.RSSI(i);
bssid = WiFi.BSSID(i);
// channel peak stat
if (peak_list[idx] < rssi)
{
peak_list[idx] = rssi;
peak_id_list[idx] = i;
}
// check signal come from same AP
bool duplicate_SSID = false;
for (int j = 0; j < i; j++)
{
if ((WiFi.channel(j) == channel) && matchBssidPrefix(WiFi.BSSID(j), bssid))
{
duplicate_SSID = true;
break;
}
}
if (!duplicate_SSID)
{
ap_count_list[idx]++;
// noise stat
int32_t noise = rssi - RSSI_FLOOR;
noise *= noise;
if (channel > 4)
{
noise_list[idx - 4] += noise;
}
if (channel > 3)
{
noise_list[idx - 3] += noise;
}
if (channel > 2)
{
noise_list[idx - 2] += noise;
}
if (channel > 1)
{
noise_list[idx - 1] += noise;
}
noise_list[idx] += noise;
if (channel < 14)
{
noise_list[idx + 1] += noise;
}
if (channel < 13)
{
noise_list[idx + 2] += noise;
}
if (channel < 12)
{
noise_list[idx + 3] += noise;
}
if (channel < 11)
{
noise_list[idx + 4] += noise;
}
}
}
// plot found WiFi info
for (int i = 0; i < n; i++)
{
channel = WiFi.channel(i);
idx = channel - 1;
rssi = WiFi.RSSI(i);
color = channel_color[idx];
height = constrain(map(rssi, RSSI_FLOOR, RSSI_CEILING, 1, graph_height), 1, graph_height);
offset = (channel + 1) * channel_width;
// trim rssi with RSSI_FLOOR
if (rssi < RSSI_FLOOR)
{
rssi = RSSI_FLOOR;
}
// plot chart
// gfx->drawLine(offset, graph_baseline - height, offset - signal_width, graph_baseline + 1, color);
// gfx->drawLine(offset, graph_baseline - height, offset + signal_width, graph_baseline + 1, color);
gfx->startWrite();
gfx->writeEllipseHelper(offset, graph_baseline + 1, signal_width, height, 0b0011, color);
gfx->endWrite();
if (i == peak_id_list[idx])
{
// Print SSID, signal strengh and if not encrypted
String ssid = WiFi.SSID(i);
if (ssid.length() == 0)
{
ssid = WiFi.BSSIDstr(i);
}
text_width = (ssid.length() + 6) * 6;
if (text_width > w)
{
offset = 0;
}
else
{
offset -= signal_width;
if ((offset + text_width) > w)
{
offset = w - text_width;
}
}
gfx->setTextColor(color);
gfx->setCursor(offset, graph_baseline - 10 - height);
gfx->print(ssid);
gfx->print('(');
gfx->print(rssi);
gfx->print(')');
#if defined(ESP32)
if (WiFi.encryptionType(i) == WIFI_AUTH_OPEN)
#else
if (WiFi.encryptionType(i) == ENC_TYPE_NONE)
#endif
{
gfx->print('*');
}
}
}
}
// print WiFi stat
gfx->setTextColor(RGB565_WHITE);
gfx->setCursor(0, banner_height);
gfx->print(n);
gfx->print(" networks found, lesser noise channels: ");
bool listed_first_channel = false;
int32_t min_noise = noise_list[0]; // init with channel 1 value
for (channel = 2; channel <= 11; channel++) // channels 12-14 may not available
{
idx = channel - 1;
log_i("min_noise: %d, noise_list[%d]: %d", min_noise, idx, noise_list[idx]);
if (noise_list[idx] < min_noise)
{
min_noise = noise_list[idx];
}
}
for (channel = 1; channel <= 11; channel++) // channels 12-14 may not available
{
idx = channel - 1;
// check channel with min noise
if (noise_list[idx] == min_noise)
{
if (!listed_first_channel)
{
listed_first_channel = true;
}
else
{
gfx->print(", ");
}
gfx->print(channel);
}
}
// draw graph base axle
gfx->drawFastHLine(0, graph_baseline, gfx->width(), RGB565_WHITE);
for (channel = 1; channel <= 14; channel++)
{
idx = channel - 1;
offset = (channel + 1) * channel_width;
gfx->setTextColor(channel_color[idx]);
gfx->setCursor(offset - ((channel < 10) ? 3 : 6), graph_baseline + 2);
gfx->print(channel);
if (ap_count_list[idx] > 0)
{
gfx->setCursor(offset - ((ap_count_list[idx] < 10) ? 9 : 12), graph_baseline + 8 + 2);
gfx->print('{');
gfx->print(ap_count_list[idx]);
gfx->print('}');
}
}
#ifdef CANVAS
gfx->flush();
#endif
// Wait a bit before scanning again
delay(SCAN_INTERVAL);
#if defined(SCAN_COUNT_SLEEP)
// POWER SAVING
if (++scan_count >= SCAN_COUNT_SLEEP)
{
#if defined(LCD_PWR_PIN)
pinMode(LCD_PWR_PIN, INPUT); // disable pin
#endif
#if defined(GFX_BL)
pinMode(GFX_BL, INPUT); // disable pin
#endif
#if defined(ESP32)
esp_sleep_enable_ext0_wakeup(GPIO_NUM_36, LOW);
esp_deep_sleep_start();
#else
ESP.deepSleep(0);
#endif
}
#endif // defined(SCAN_COUNT_SLEEP)
}
运行效果
- 屏幕显示
06_gfx_u8g2_font
本示例演示 ESP32-S3-LCD-0.85 使用 GFX_Library_for_Arduino 库通过加载字库,实现各国文字显示
代码
06_gfx_u8g2_font.ino
#include <U8g2lib.h>
#include <Arduino_GFX_Library.h>
#define GFX_BL 46 // default backlight pin, you may replace DF_GFX_BL to actual backlight pin
/* More data bus class: https://github.com/moononournation/Arduino_GFX/wiki/Data-Bus-Class */
Arduino_DataBus *bus = new Arduino_ESP32SPI(45 /* DC */, 21 /* CS */, 38 /* SCK */, 39 /* MOSI */, GFX_NOT_DEFINED /* MISO */);
/* More display class: https://github.com/moononournation/Arduino_GFX/wiki/Display-Class */
Arduino_GFX *gfx = new Arduino_GC9107(bus, 40 /* RST */, 0 /* rotation */, true /* IPS */);
void setup(void)
{
#ifdef DEV_DEVICE_INIT
DEV_DEVICE_INIT();
#endif
Serial.begin(115200);
// Serial.setDebugOutput(true);
// while(!Serial);
Serial.println("Arduino_GFX U8g2 Font Print UTF8 example");
// Init Display
if (!gfx->begin())
{
Serial.println("gfx->begin() failed!");
}
gfx->fillScreen(RGB565_BLACK);
gfx->setUTF8Print(true); // enable UTF8 support for the Arduino print() function
#ifdef GFX_BL
pinMode(GFX_BL, OUTPUT);
digitalWrite(GFX_BL, HIGH);
#endif
int16_t x1, y1;
uint16_t w, h;
/* U8g2 font list: https://github.com/olikraus/u8g2/wiki/fntlistall */
/* U8g2 Unifont list: https://github.com/olikraus/u8g2/wiki/fntgrpunifont */
gfx->setFont(u8g2_font_unifont_tr);
gfx->setTextColor(RGB565_RED);
gfx->setCursor(0, 16);
// gfx->getTextBounds("Hello World!", 1, 16, &x1, &y1, &w, &h);
// gfx->drawRect(x1 - 1, y1 - 1, w + 2, h + 2, RGB565_RED);
gfx->println("Hello World!");
gfx->setFont(u8g2_font_unifont_t_polish);
gfx->setTextColor(RGB565_YELLOW);
gfx->setCursor(0, 36);
// gfx->getTextBounds("Witaj świecie!", 1, 36, &x1, &y1, &w, &h);
// gfx->drawRect(x1 - 1, y1 - 1, w + 2, h + 2, RGB565_RED);
gfx->println("Witaj świecie!");
gfx->setFont(u8g2_font_unifont_t_vietnamese1);
gfx->setTextColor(RGB565_GREEN);
gfx->setCursor(0, 56);
// gfx->getTextBounds("Chào thế giới!", 1, 56, &x1, &y1, &w, &h);
// gfx->drawRect(x1 - 1, y1 - 1, w + 2, h + 2, RGB565_RED);
gfx->println("Chào thế giới!");
#ifdef U8G2_USE_LARGE_FONTS
gfx->setFont(u8g2_font_unifont_t_chinese2);
gfx->setTextColor(RGB565_CYAN);
gfx->setCursor(0, 76);
// gfx->getTextBounds("世界你好!", 1, 76, &x1, &y1, &w, &h);
// gfx->drawRect(x1 - 1, y1 - 1, w + 2, h + 2, RGB565_RED);
gfx->println("世界你好!");
gfx->setFont(u8g2_font_unifont_t_japanese1);
gfx->setTextColor(RGB565_BLUE);
gfx->setCursor(0, 96);
// gfx->getTextBounds("こんにちは世界!", 1, 96, &x1, &y1, &w, &h);
// gfx->drawRect(x1 - 1, y1 - 1, w + 2, h + 2, RGB565_RED);
gfx->println("こんにちは世界!");
gfx->setFont(u8g2_font_unifont_t_korean1);
gfx->setTextColor(RGB565_MAGENTA);
gfx->setCursor(0, 116);
// gfx->getTextBounds("안녕하세요, 세계입니다!", 1, 116, &x1, &y1, &w, &h);
// gfx->drawRect(x1 - 1, y1 - 1, w + 2, h + 2, RGB565_RED);
gfx->println("안녕하세요, 세계입니다!");
#endif // U8G2_USE_LARGE_FONTS
}
void loop()
{
}
运行效果
- 屏幕显示

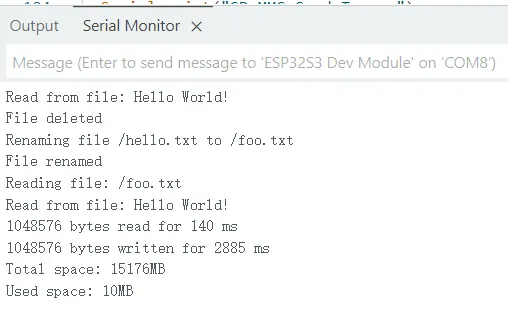
07_sd_card_test
本示例使用 ESP32-S3-LCD-0.85 测试 SD 卡的读写功能
代码
07_sd_card_test.ino
#include "FS.h"
#include "SD_MMC.h"
int clk = 16;
int cmd = 15;
int d0 = 17;
int d1 = 18;
int d2 = 13;
int d3 = 14;
void listDir(fs::FS &fs, const char *dirname, uint8_t levels) {
Serial.printf("Listing directory: %s\n", dirname);
File root = fs.open(dirname);
if (!root) {
Serial.println("Failed to open directory");
return;
}
if (!root.isDirectory()) {
Serial.println("Not a directory");
return;
}
File file = root.openNextFile();
while (file) {
if (file.isDirectory()) {
Serial.print(" DIR : ");
Serial.println(file.name());
if (levels) {
listDir(fs, file.path(), levels - 1);
}
} else {
Serial.print(" FILE: ");
Serial.print(file.name());
Serial.print(" SIZE: ");
Serial.println(file.size());
}
file = root.openNextFile();
}
}
void createDir(fs::FS &fs, const char *path) {
Serial.printf("Creating Dir: %s\n", path);
if (fs.mkdir(path)) {
Serial.println("Dir created");
} else {
Serial.println("mkdir failed");
}
}
void removeDir(fs::FS &fs, const char *path) {
Serial.printf("Removing Dir: %s\n", path);
if (fs.rmdir(path)) {
Serial.println("Dir removed");
} else {
Serial.println("rmdir failed");
}
}
void readFile(fs::FS &fs, const char *path) {
Serial.printf("Reading file: %s\n", path);
File file = fs.open(path);
if (!file) {
Serial.println("Failed to open file for reading");
return;
}
Serial.print("Read from file: ");
while (file.available()) {
Serial.write(file.read());
}
}
void writeFile(fs::FS &fs, const char *path, const char *message) {
Serial.printf("Writing file: %s\n", path);
File file = fs.open(path, FILE_WRITE);
if (!file) {
Serial.println("Failed to open file for writing");
return;
}
if (file.print(message)) {
Serial.println("File written");
} else {
Serial.println("Write failed");
}
}
void appendFile(fs::FS &fs, const char *path, const char *message) {
Serial.printf("Appending to file: %s\n", path);
File file = fs.open(path, FILE_APPEND);
if (!file) {
Serial.println("Failed to open file for appending");
return;
}
if (file.print(message)) {
Serial.println("Message appended");
} else {
Serial.println("Append failed");
}
}
void renameFile(fs::FS &fs, const char *path1, const char *path2) {
Serial.printf("Renaming file %s to %s\n", path1, path2);
if (fs.rename(path1, path2)) {
Serial.println("File renamed");
} else {
Serial.println("Rename failed");
}
}
void deleteFile(fs::FS &fs, const char *path) {
Serial.printf("Deleting file: %s\n", path);
if (fs.remove(path)) {
Serial.println("File deleted");
} else {
Serial.println("Delete failed");
}
}
void testFileIO(fs::FS &fs, const char *path) {
File file = fs.open(path);
static uint8_t buf[512];
size_t len = 0;
uint32_t start = millis();
uint32_t end = start;
if (file) {
len = file.size();
size_t flen = len;
start = millis();
while (len) {
size_t toRead = len;
if (toRead > 512) {
toRead = 512;
}
file.read(buf, toRead);
len -= toRead;
}
end = millis() - start;
Serial.printf("%u bytes read for %lu ms\n", flen, end);
file.close();
} else {
Serial.println("Failed to open file for reading");
}
file = fs.open(path, FILE_WRITE);
if (!file) {
Serial.println("Failed to open file for writing");
return;
}
size_t i;
start = millis();
for (i = 0; i < 2048; i++) {
file.write(buf, 512);
}
end = millis() - start;
Serial.printf("%u bytes written for %lu ms\n", 2048 * 512, end);
file.close();
}
void setup() {
Serial.begin(115200);
delay(3000);
  if (!SD_MMC.setPins(clk, cmd, d0, d1, d2, d3)) {
  Serial.println("Pin change failed!");
  return;
}
if (!SD_MMC.begin()) {
  Serial.println("Card Mount Failed");
  return;
}
uint8_t cardType = SD_MMC.cardType();
if (cardType == CARD_NONE) {
Serial.println("No SD_MMC card attached");
return;
}
Serial.print("SD_MMC Card Type: ");
if (cardType == CARD_MMC) {
Serial.println("MMC");
} else if (cardType == CARD_SD) {
Serial.println("SDSC");
} else if (cardType == CARD_SDHC) {
Serial.println("SDHC");
} else {
Serial.println("UNKNOWN");
}
uint64_t cardSize = SD_MMC.cardSize() / (1024 * 1024);
Serial.printf("SD_MMC Card Size: %lluMB\n", cardSize);
listDir(SD_MMC, "/", 0);
createDir(SD_MMC, "/mydir");
listDir(SD_MMC, "/", 0);
removeDir(SD_MMC, "/mydir");
listDir(SD_MMC, "/", 2);
writeFile(SD_MMC, "/hello.txt", "Hello ");
appendFile(SD_MMC, "/hello.txt", "World!\n");
readFile(SD_MMC, "/hello.txt");
deleteFile(SD_MMC, "/foo.txt");
renameFile(SD_MMC, "/hello.txt", "/foo.txt");
readFile(SD_MMC, "/foo.txt");
testFileIO(SD_MMC, "/test.txt");
Serial.printf("Total space: %lluMB\n", SD_MMC.totalBytes() / (1024 * 1024));
Serial.printf("Used space: %lluMB\n", SD_MMC.usedBytes() / (1024 * 1024));
}
void loop() {
delay(10);
}
代码解释
-
SD 卡初始化 :
if (!SD_MMC.setPins(clk, cmd, d0, d1, d2, d3)) {Serial.println("Pin change failed!");return;}if (!SD_MMC.begin()) {Serial.println("Card Mount Failed");return;}
运行效果
- 屏幕无现象
- 打开串口监视器
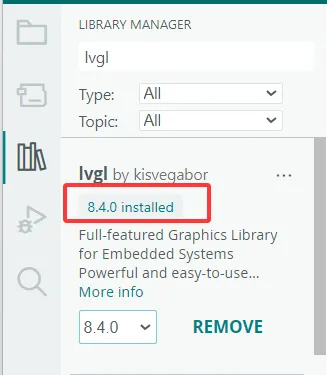
08_lvgl_example_v8
本示例演示了使用 ESP32-S3-LCD-0.85 运行 lvgl(v8.4.0)示例程序。
-
需要安装 lvgl v8.4.0 版本,如已安装其他版本,请重新安装。
代码
08_lvgl_example_v8.ino
/*Using LVGL with Arduino requires some extra steps:
 *Be sure to read the docs here: https://lvgl.io/docs/open/integration/frameworks/arduino  */

#include <lvgl.h>

/*To use the built-in examples and demos of LVGL uncomment the includes below respectively.
 *You also need to copy `lvgl/examples` to `lvgl/src/examples`. Similarly for the demos `lvgl/demos` to `lvgl/src/demos`.
 Note that the `lv_examples` library is for LVGL v7 and you shouldn't install it for this version (since LVGL v8)
 as the examples and demos are now part of the main LVGL library. */

// #include <examples/lv_examples.h>
// #include <demos/lv_demos.h>

// #define DIRECT_MODE // Uncomment to enable full frame buffer

#include <Arduino_GFX_Library.h>

#define GFX_BL 46 // default backlight pin, you may replace DF_GFX_BL to actual backlight pin

/* More data bus class: https://github.com/moononournation/Arduino_GFX/wiki/Data-Bus-Class */
Arduino_DataBus *bus = new Arduino_ESP32SPI(45 /* DC */, 21 /* CS */, 38 /* SCK */, 39 /* MOSI */, GFX_NOT_DEFINED /* MISO */);

/* More display class: https://github.com/moononournation/Arduino_GFX/wiki/Display-Class */
Arduino_GFX *gfx = new Arduino_GC9107(bus, 40 /* RST */, 0 /* rotation */, true /* IPS */);

uint32_t screenWidth;
uint32_t screenHeight;
uint32_t bufSize;
lv_disp_draw_buf_t draw_buf;
lv_color_t *disp_draw_buf1;
lv_color_t *disp_draw_buf2;
lv_disp_drv_t disp_drv;

/* Display flushing */
void my_disp_flush(lv_disp_drv_t *disp_drv, const lv_area_t *area, lv_color_t *color_p) {
  uint32_t w = (area->x2 - area->x1 + 1);
  uint32_t h = (area->y2 - area->y1 + 1);

#if (LV_COLOR_16_SWAP != 0)
  gfx->draw16bitBeRGBBitmap(area->x1, area->y1, (uint16_t *)&color_p->full, w, h);
#else
  gfx->draw16bitRGBBitmap(area->x1, area->y1, (uint16_t *)&color_p->full, w, h);
#endif

  lv_disp_flush_ready(disp_drv);
}

void setup() {

  Serial.begin(115200);
  Serial.println("Arduino_GFX Hello World example");

  // Init Display
  if (!gfx->begin()) {
    Serial.println("gfx->begin() failed!");
  }

  gfx->fillScreen(RGB565_BLACK);

#ifdef GFX_BL
  pinMode(GFX_BL, OUTPUT);
  digitalWrite(GFX_BL, HIGH);
#endif

  lv_init();

  screenWidth = gfx->width();
  screenHeight = gfx->height();

  bufSize = screenWidth * 120;

  disp_draw_buf1 = (lv_color_t *)heap_caps_malloc(bufSize * 2, MALLOC_CAP_DEFAULT | MALLOC_CAP_8BIT);

  disp_draw_buf2 = (lv_color_t *)heap_caps_malloc(bufSize * 2, MALLOC_CAP_DEFAULT | MALLOC_CAP_8BIT);

  lv_disp_draw_buf_init(&draw_buf, disp_draw_buf1, disp_draw_buf2, bufSize);

  /* Initialize the display */
  lv_disp_drv_init(&disp_drv);
  /* Change the following line to your display resolution */
  disp_drv.hor_res = screenWidth;
  disp_drv.ver_res = screenHeight;
  disp_drv.flush_cb = my_disp_flush;
  disp_drv.draw_buf = &draw_buf;

  lv_disp_drv_register(&disp_drv);

  /* Initialize the (dummy) input device driver */
  lv_obj_t *label = lv_label_create(lv_scr_act());
  lv_label_set_text(label, "Hello Arduino!\n (V" GFX_STR(LVGL_VERSION_MAJOR) "." GFX_STR(LVGL_VERSION_MINOR) "." GFX_STR(LVGL_VERSION_PATCH) ")");
  lv_obj_align(label, LV_ALIGN_CENTER, 0, 0);

  /* Option 3: Or try out a demo. Don't forget to enable the demos in lv_conf.h. E.g. LV_USE_DEMOS_WIDGETS*/
  // lv_demo_widgets();
  // lv_demo_benchmark();
  // lv_demo_keypad_encoder();
  // lv_demo_music();
  // lv_demo_stress();

  Serial.println("Setup done");
}

void loop() {
  lv_timer_handler(); /* let the GUI do its work */
  delay(1);
}
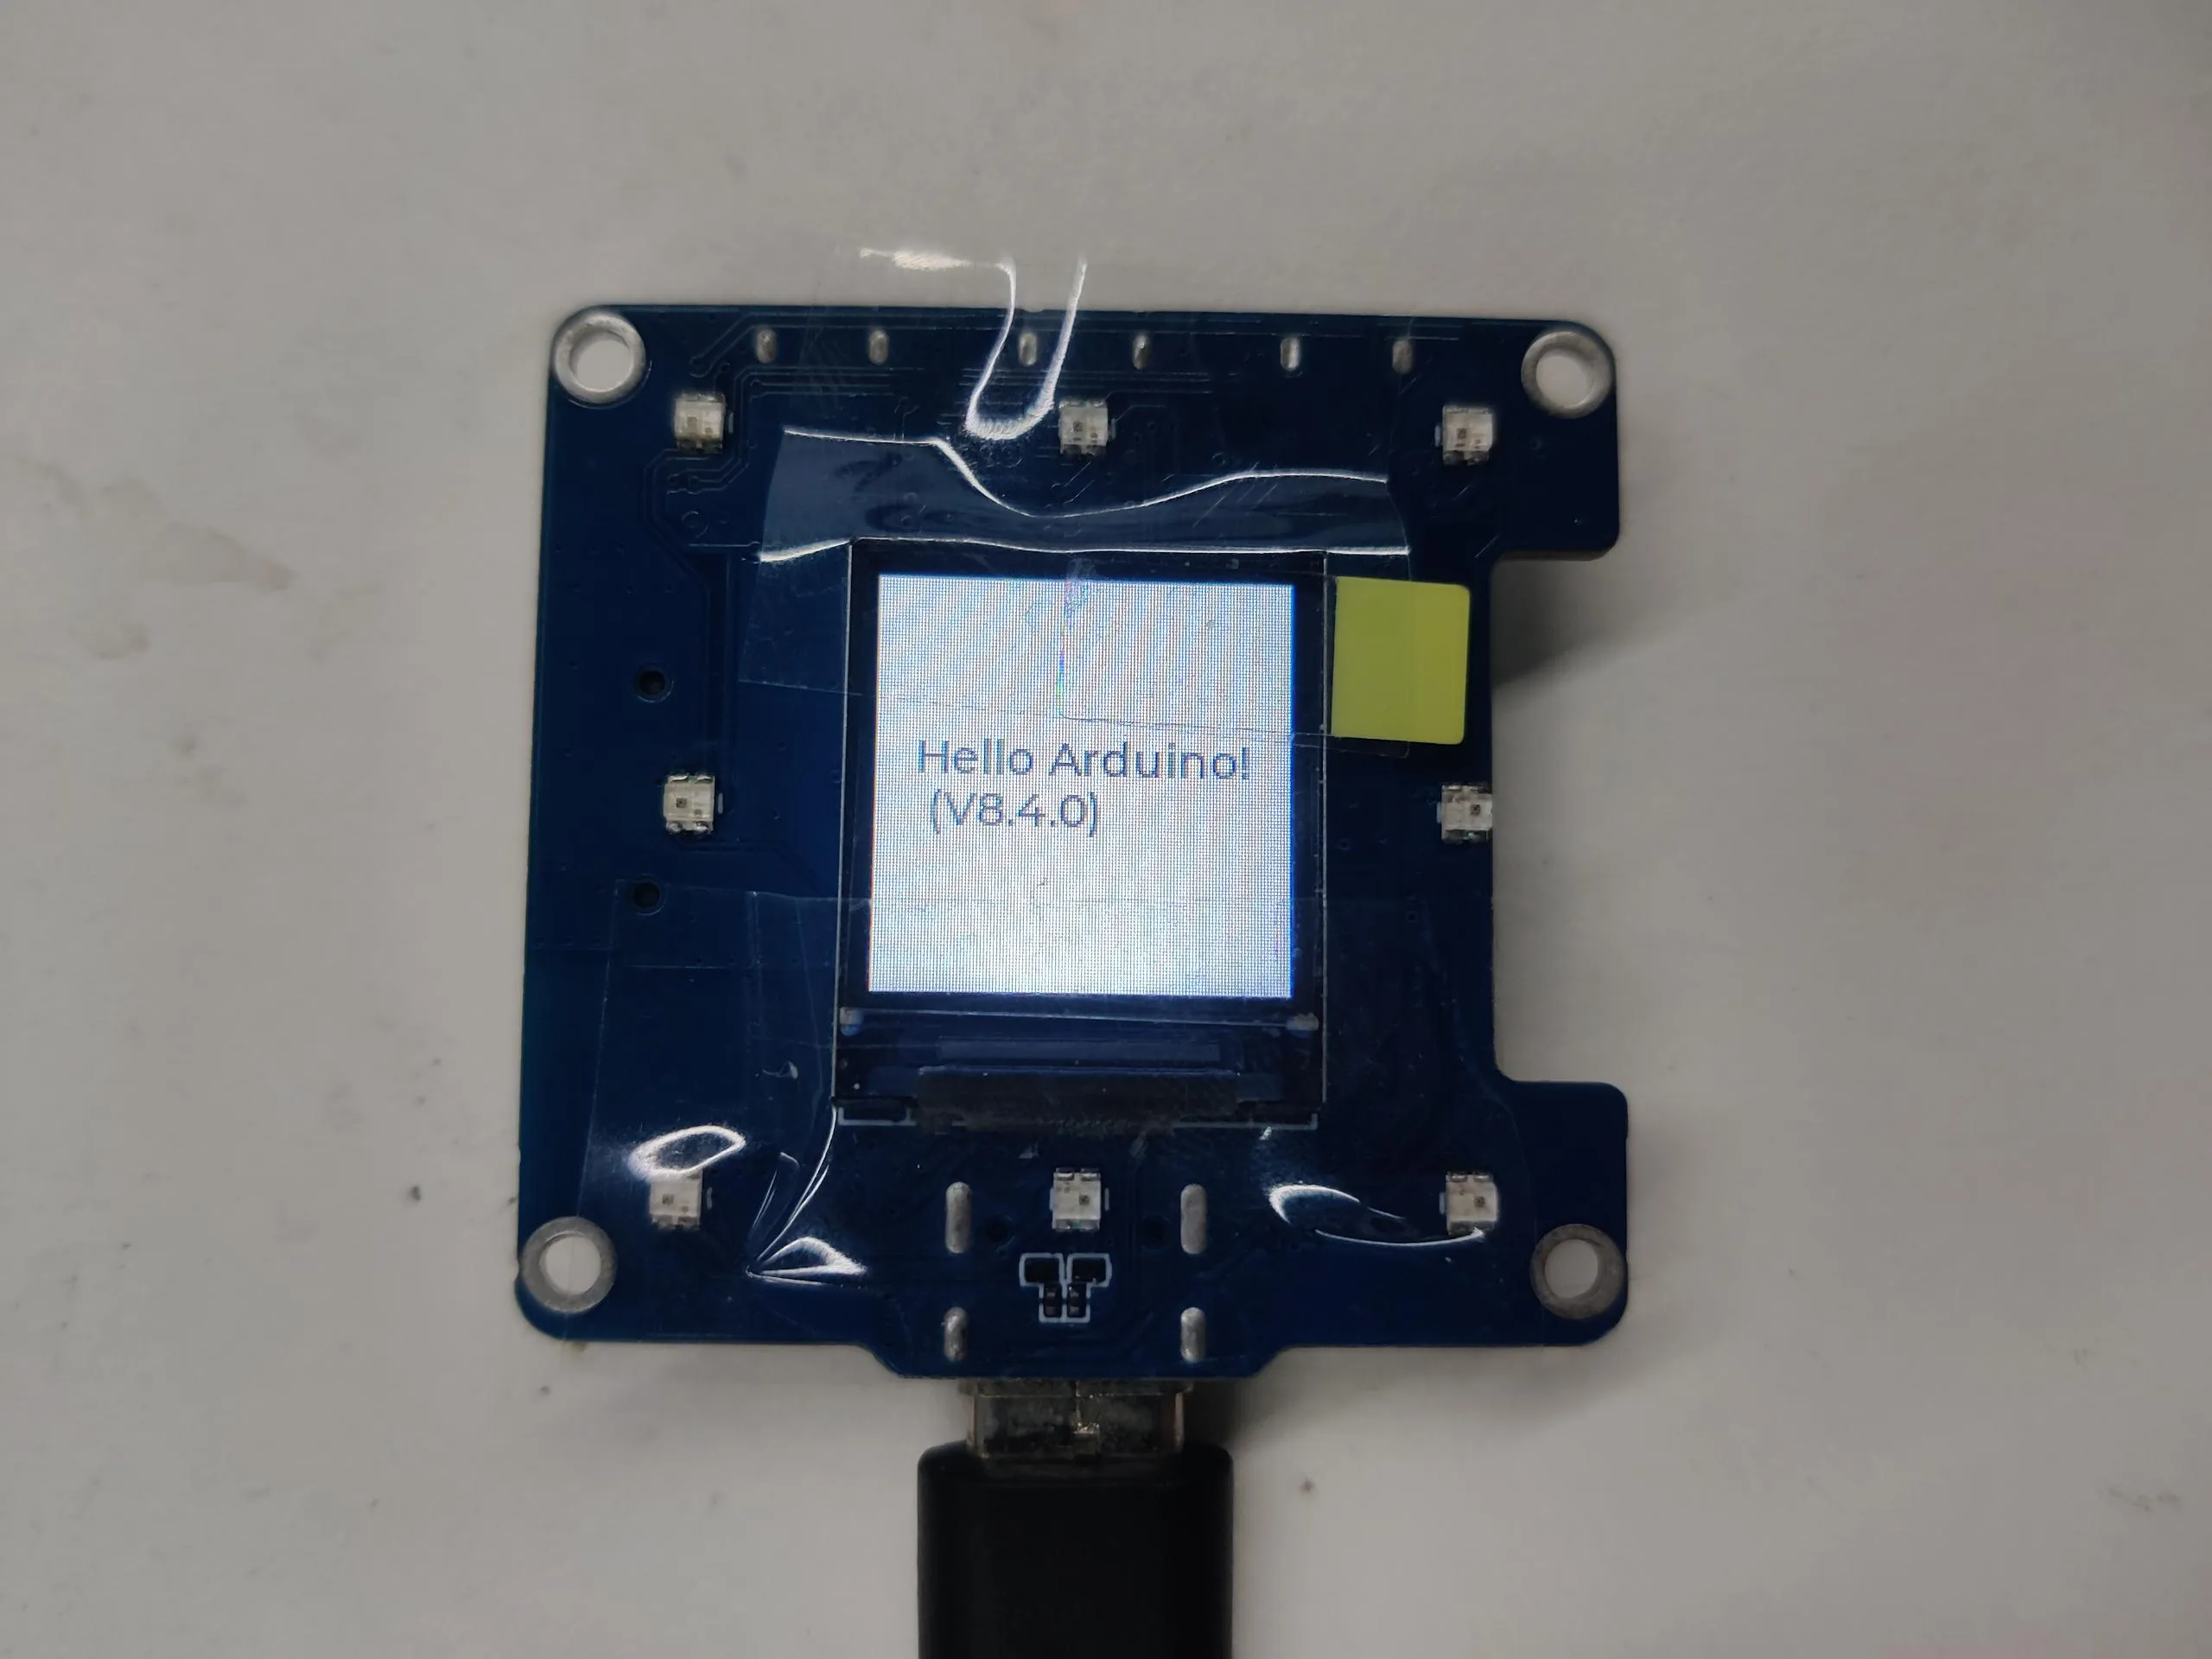
运行效果
- 屏幕显示
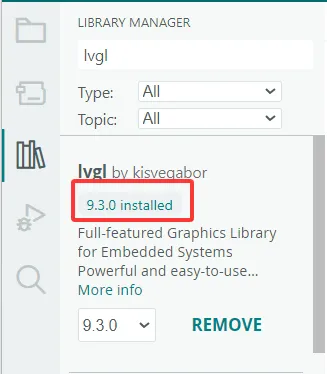
09_lvgl_example_v9
本示例演示了使用 ESP32-S3-LCD-0.85 运行 lvgl(v9.3.0)示例程序。
-
需要安装 lvgl v9.3.0 版本,如已安装其他版本,请重新安装。
代码
09_lvgl_example_v9.ino
/*Using LVGL with Arduino requires some extra steps:
 *Be sure to read the docs here: https://lvgl.io/docs/open/integration/frameworks/arduino  */

#include <lvgl.h>

/*To use the built-in examples and demos of LVGL uncomment the includes below respectively.
 *You also need to copy `lvgl/examples` to `lvgl/src/examples`. Similarly for the demos `lvgl/demos` to `lvgl/src/demos`.
 *Note that the `lv_examples` library is for LVGL v7 and you shouldn't install it for this version (since LVGL v8)
 *as the examples and demos are now part of the main LVGL library. */

// #include <examples/lv_examples.h>
// #include <demos/lv_demos.h>

// #define DIRECT_RENDER_MODE // Uncomment to enable full frame buffer

#include <Arduino_GFX_Library.h>

#define GFX_BL 46 // default backlight pin, you may replace DF_GFX_BL to actual backlight pin

/* More data bus class: https://github.com/moononournation/Arduino_GFX/wiki/Data-Bus-Class */
Arduino_DataBus *bus = new Arduino_ESP32SPI(45 /* DC */, 21 /* CS */, 38 /* SCK */, 39 /* MOSI */, GFX_NOT_DEFINED /* MISO */);

/* More display class: https://github.com/moononournation/Arduino_GFX/wiki/Display-Class */
Arduino_GFX *gfx = new Arduino_GC9107(bus, 40 /* RST */, 0 /* rotation */, true /* IPS */);

uint32_t screenWidth;
uint32_t screenHeight;
uint32_t bufSize;
lv_display_t *disp;
lv_color_t *disp_draw_buf;

#if LV_USE_LOG != 0
void my_print(lv_log_level_t level, const char *buf)
{
  LV_UNUSED(level);
  Serial.println(buf);
  Serial.flush();
}
#endif

uint32_t millis_cb(void)
{
  return millis();
}

/* LVGL calls it when a rendered image needs to copied to the display*/
void my_disp_flush(lv_display_t *disp, const lv_area_t *area, uint8_t *px_map)
{
#ifndef DIRECT_RENDER_MODE
  uint32_t w = lv_area_get_width(area);
  uint32_t h = lv_area_get_height(area);

  gfx->draw16bitRGBBitmap(area->x1, area->y1, (uint16_t *)px_map, w, h);
#endif // #ifndef DIRECT_RENDER_MODE

  /*Call it to tell LVGL you are ready*/
  lv_disp_flush_ready(disp);
}

void setup()
{
#ifdef DEV_DEVICE_INIT
  DEV_DEVICE_INIT();
#endif

  Serial.begin(115200);
  // Serial.setDebugOutput(true);
  // while(!Serial);
  Serial.println("Arduino_GFX LVGL_Arduino_v9 example ");
  String LVGL_Arduino = String('V') + lv_version_major() + "." + lv_version_minor() + "." + lv_version_patch();
  Serial.println(LVGL_Arduino);

  // Init Display
  if (!gfx->begin())
  {
    Serial.println("gfx->begin() failed!");
  }
  gfx->fillScreen(RGB565_BLACK);

#ifdef GFX_BL
  pinMode(GFX_BL, OUTPUT);
  digitalWrite(GFX_BL, HIGH);
#endif

  lv_init();

  /*Set a tick source so that LVGL will know how much time elapsed. */
  lv_tick_set_cb(millis_cb);

  /* register print function for debugging */
#if LV_USE_LOG != 0
  lv_log_register_print_cb(my_print);
#endif

  screenWidth = gfx->width();
  screenHeight = gfx->height();

#ifdef DIRECT_RENDER_MODE
  bufSize = screenWidth * screenHeight;
#else
  bufSize = screenWidth * 120;
#endif

  disp_draw_buf = (lv_color_t *)heap_caps_malloc(bufSize * 2, MALLOC_CAP_INTERNAL | MALLOC_CAP_8BIT);
  if (!disp_draw_buf)
  {
    // remove MALLOC_CAP_INTERNAL flag try again
    disp_draw_buf = (lv_color_t *)heap_caps_malloc(bufSize * 2, MALLOC_CAP_8BIT);
  }

  if (!disp_draw_buf)
  {
    Serial.println("LVGL disp_draw_buf allocate failed!");
  }
  else
  {
    disp = lv_display_create(screenWidth, screenHeight);
    lv_display_set_flush_cb(disp, my_disp_flush);
#ifdef DIRECT_RENDER_MODE
    lv_display_set_buffers(disp, disp_draw_buf, NULL, bufSize * 2, LV_DISPLAY_RENDER_MODE_DIRECT);
#else
    lv_display_set_buffers(disp, disp_draw_buf, NULL, bufSize * 2, LV_DISPLAY_RENDER_MODE_PARTIAL);
#endif

    /*Initialize the (dummy) input device driver*/
    // lv_indev_t *indev = lv_indev_create();
    // lv_indev_set_type(indev, LV_INDEV_TYPE_POINTER); /*Touchpad should have POINTER type*/
    // lv_indev_set_read_cb(indev, my_touchpad_read);

    /* Option 1: Create a simple label
     * ---------------------
     */
    lv_obj_t *label = lv_label_create(lv_scr_act());
    lv_label_set_text(label, "Hello Arduino, \nI'm LVGL!(V" GFX_STR(LVGL_VERSION_MAJOR) "." GFX_STR(LVGL_VERSION_MINOR) "." GFX_STR(LVGL_VERSION_PATCH) ")");
    lv_obj_align(label, LV_ALIGN_CENTER, 0, 0);

    /* Option 2: Try an example. See all the examples
     *  - Online: https://docs.lvgl.io/master/examples.html
     *  - Source codes: https://github.com/lvgl/lvgl/tree/master/examples
     * ----------------------------------------------------------------
     */
    // lv_example_btn_1();

    /* Option 3: Or try out a demo. Don't forget to enable the demos in lv_conf.h. E.g. LV_USE_DEMOS_WIDGETS
     * -------------------------------------------------------------------------------------------
     */
    // lv_demo_widgets();
    // lv_demo_benchmark();
    // lv_demo_keypad_encoder();
    // lv_demo_music();
    // lv_demo_stress();
  }

  Serial.println("Setup done");
}

void loop()
{
  lv_task_handler(); /* let the GUI do its work */
  delay(5);
}
运行效果
- 屏幕显示
