Arduino 开发
本章节包含以下部分,请按需阅读:
Arduino 入门教程
初次接触 Arduino ESP32 开发,想要快速上手?我们为您准备了一套通用的 入门教程。
- 第0节 认识 ESP32
- 第1节 安装和配置 Arduino IDE
- 第2节 Arduino 基础知识
- 第3节 数字输出/输入
- 第4节 模拟输入
- 第5节 脉冲宽度调制 (PWM)
- 第6节 串行通信 (UART)
- 第7节 I2C 通信
- 第8节 SPI 通信
- 第9节 Wi-Fi 基础用法
- 第10节 网页服务器
- 第11节 蓝牙 (Bluetooth)
- 第12节 LVGL 图形界面开发
- 第13节 综合项目
请注意:该教程使用 ESP32-S3-Zero 作为教学示例,所有硬件代码均基于其引脚布局。在动手实践前,建议您对照手中的开发板引脚图,确认引脚配置无误。
配置开发环境
1. 安装和配置 Arduino IDE
请参考 安装和配置 Arduino IDE 教程 下载安装 Arduino IDE 并添加 ESP32 支持。
| 板名称 | 板安装要求 | 版本号要求 |
|---|---|---|
| esp32 by Espressif Systems | “离线”安装/“在线”安装 | 3.3.7 |
| FastLED | FastLED | 3.1.0 |
| AnimatedGIF | AnimatedGIF | 2.2.0 |
| Adafruit SHTC3 Library | Adafruit SHTC3 Library | 1.0.2 |
| SensorLib | SensorLib | 0.4.1 |
| ESP32-audiol2S-master | ESP32-audiol2S-master | 3.4.6 |
| U8g2_for_Adafruit_GFX | U8g2_for_Adafruit_GFX | 1.8.0 |
备注
ESP32-HUB75-MatrixPanel-I2S-DMA 库已随示例工程一同提供,位于各示例目录内,无需单独安装。
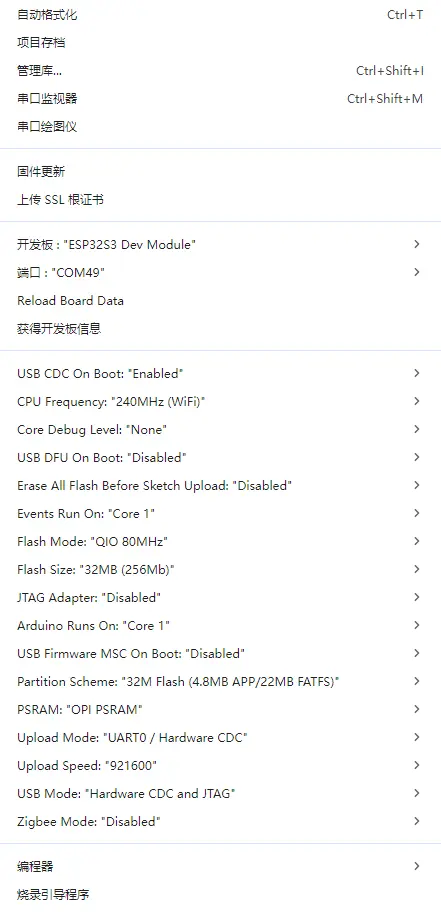
Arduino 设置:
3. 运行示例
Arduino 示例程序:ESP32-S3-RGB-Matrix 示例程序-GitHub Arduino 示例程序:ESP32-S3-RGB-Matrix 示例程序-Gitee
下面给出每个示例的目的、要点说明与运行效果(以便快速上手)。
| 示例程序 | 基础例程说明 | 依赖库 |
|---|---|---|
| 01_SimpleTestShapes | 简单形状绘画 | - |
| 02_PatternPlasma | 等离子特效 | FastLED |
| 03_DoubleBuffer | 双缓冲测试,绘制动态图形 | - |
| 04_OtherShiftDriverPanel | 使用驱动芯片驱动屏幕 | FastLED |
| 05_AnimatedGIFPanel_SD | 读取 SD 卡中的 GIF 图片并显示 | AnimatedGIF |
| 06_BitmapIcons | 显示bmp 图片 | - |
| 07_Pixel_Mapping_Test | 展示HUB75基本控制逻辑 | - |
| 08_Sensor_Test | 传感器测试 | Adafruit SHTC3 Library、SensorQMI8658 |
| 09_Music_Player | 音乐播放器 | ESP32-Audio |
| 10_Chinese_Font | 中文字体显示 | U8g2_for_Adafruit_GFX |
提示
注意:
- 若驱动P4系列的屏幕,注意在代码中添加mxconfig.driver = HUB75_I2S_CFG::SHIFTREG;,否则会导致显示异常。
01_SimpleTestShapes
【代码分析】
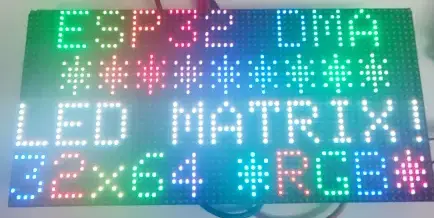
loop():按顺序执行文字绘制、纯色填充与清屏操作,用于快速验证面板的基础显示功能。drawText(wheelval):根据wheelval绘制文字并改变颜色效果,用于检查字符渲染与颜色变化是否正常。dma_display->fillScreen():依次将屏幕填充为黑、红、绿、蓝、白等纯色,便于观察整屏刷新与颜色显示效果。delay(2000):每个显示步骤停留 2 秒,方便肉眼确认画面是否正确。dma_display->clearScreen():在测试结束后清空画面,避免上一帧内容残留。
void loop() {

  // animate by going through the colour wheel for the first two lines
  drawText(wheelval);
  wheelval +=1;
  delay(2000);
  dma_display->clearScreen();
  dma_display->fillScreen(myBLACK);
  delay(2000);
  dma_display->fillScreen( myRED);
  delay(2000);
  dma_display->fillScreen(myGREEN);
  delay(2000);
  dma_display->fillScreen(myBLUE);
  delay(2000);
  dma_display->fillScreen(myWHITE);
  delay(2000);
  dma_display->clearScreen();

}
【运行效果】
02_PatternPlasma
【代码分析】
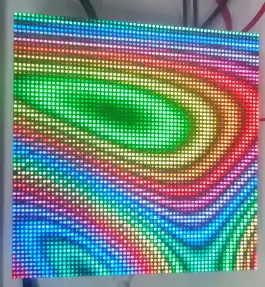
loop():通过逐像素计算与调色板映射生成动态等离子特效。for (int x ...)/for (int y ...):遍历整块面板的每个像素,逐点计算并绘制颜色。sin8()、sin16()、cos16():结合坐标和time_counter生成动态变化的中间值v,构造流动波纹效果。ColorFromPalette(currentPalette, (v >> 8)):根据计算结果从当前调色板中取色。dma_display->drawPixelRGB888():将计算出的 RGB 颜色写入当前像素。time_counter、cycles、fps:分别用于驱动动画变化、统计循环次数和计算绘制帧率。if (cycles >= 1024):重置计数器并随机切换调色板,实现不同色系自动轮换。Serial.printf_P():每 5 秒输出一次Effect fps,用于观察特效绘制速度。
void loop() {

    for (int x = 0; x < PANE_WIDTH; x++) {
            for (int y = 0; y <  PANE_HEIGHT; y++) {
                int16_t v = 128;
                uint8_t wibble = sin8(time_counter);
                v += sin16(x * wibble * 3 + time_counter);
                v += cos16(y * (128 - wibble)  + time_counter);
                v += sin16(y * x * cos8(-time_counter) / 8);

                currentColor = ColorFromPalette(currentPalette, (v >> 8)); //, brightness, currentBlendType);
                dma_display->drawPixelRGB888(x, y, currentColor.r, currentColor.g, currentColor.b);
            }
    }

    ++time_counter;
    ++cycles;
    ++fps;

    if (cycles >= 1024) {
        time_counter = 0;
        cycles = 0;
        currentPalette = palettes[random(0,sizeof(palettes)/sizeof(palettes[0]))];
    }

    // print FPS rate every 5 seconds
    // Note: this is NOT a matrix refresh rate, it's the number of data frames being drawn to the DMA buffer per second
    if (fps_timer + 5000 < millis()){
      Serial.printf_P(PSTR("Effect fps: %d\n"), fps/5);
      fps_timer = millis();
      fps = 0;
    }
} // end loop
【运行效果】
03_DoubleBuffer
【代码分析】
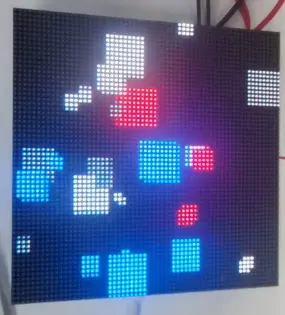
loop():演示双缓冲动画的完整流程,包括切换缓冲区、后台绘制和更新运动状态。display->flipDMABuffer():将后续绘图切换到未显示的后台缓冲区,用于减少动态图形闪烁。delay(1000/display->calculated_refresh_rate):等待当前帧完成显示,避免过早翻转缓冲区导致撕裂或闪烁。display->clearScreen():清空后台缓冲区,为新一帧绘制做准备。delay(25):模拟耗时绘图过程,用于更直观地观察启用双缓冲后的平滑效果。display->fillRect():绘制多个运动方块,形成动态测试画面。velocityx/velocityy判断逻辑:当方块碰到屏幕边界时反转运动方向,实现反弹效果。Squares[i].xpos/Squares[i].ypos更新:根据速度更新方块坐标,推动下一帧动画。
void loop()
{

  // Flip all future drawPixel calls to write to the back buffer which is NOT being displayed.
  display->flipDMABuffer();

  // SUPER IMPORTANT: Wait at least long enough to ensure that a "frame" has been displayed on the LED Matrix Panel before the next flip!
  delay(1000/display->calculated_refresh_rate);

  // Now clear the back-buffer we are drawing to.
  display->clearScreen();

  // This is here to demonstrate flicker if double buffering is disabled. Emulates a long draw routine that would typically occur after a 'clearscreen'.
  delay(25);


  for (int i = 0; i < numSquares; i++)
  {
    // Draw rect and then calculate
    display->fillRect(Squares[i].xpos, Squares[i].ypos, Squares[i].square_size, Squares[i].square_size, Squares[i].colour);

    if (Squares[i].square_size + Squares[i].xpos >= display->width()) {
      Squares[i].velocityx *= -1;
    } else if (Squares[i].xpos <= 0) {
      Squares[i].velocityx = abs (Squares[i].velocityx);
    }

    if (Squares[i].square_size + Squares[i].ypos >= display->height()) {
      Squares[i].velocityy *= -1;
    } else if (Squares[i].ypos <= 0) {
      Squares[i].velocityy = abs (Squares[i].velocityy);
    }

    Squares[i].xpos += Squares[i].velocityx;
    Squares[i].ypos += Squares[i].velocityy;
  }
}
【运行效果】
04_OtherShiftDriverPanel
【代码分析】
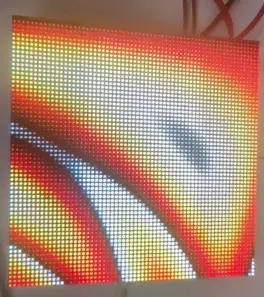
loop():持续生成整屏动态特效,用于验证带移位寄存器驱动芯片面板的显示兼容性。for (int x ...)/for (int y ...):遍历整块屏幕,对每个像素分别计算颜色值。sin8()、sin16()、cos16():结合坐标和time_counter生成连续变化的颜色索引。ColorFromPalette(currentPalette, (v >> 8) + 127):根据中间值从调色板中映射出最终颜色。dma_display->drawPixelRGB888():将 RGB 颜色逐点写入 DMA 显示缓冲区。time_counter、cycles、fps:分别用于驱动动画变化、控制换色周期和统计绘制帧率。if (cycles >= 1024):定期重置动画参数并随机切换调色板,便于观察不同色彩下的显示效果。Serial.printf_P():周期输出 FPS 信息,用于评估当前图案绘制速度。
void loop(){
   for (int x = 0; x <  dma_display->width(); x++) {
        for (int y = 0; y <  dma_display->height(); y++) {
            int16_t v = 0;
            uint8_t wibble = sin8(time_counter);
            v += sin16(x * wibble * 3 + time_counter);
            v += cos16(y * (128 - wibble)  + time_counter);
            v += sin16(y * x * cos8(-time_counter) / 8);

            currentColor = ColorFromPalette(currentPalette, (v >> 8) + 127); //, brightness, currentBlendType);
            dma_display->drawPixelRGB888(x, y, currentColor.r, currentColor.g, currentColor.b);
        }
    }

    ++time_counter;
    ++cycles;
    ++fps;

    if (cycles >= 1024) {
        time_counter = 0;
        cycles = 0;
        currentPalette = palettes[random(0,sizeof(palettes)/sizeof(palettes[0]))];
    }

    // print FPS rate every 5 seconds
    // Note: this is NOT a matrix refresh rate, it's the number of data frames being drawn to the DMA buffer per second
    if (fps_timer + 5000 < millis()){
      Serial.printf_P(PSTR("Effect fps: %d\n"), fps/5);
      fps_timer = millis();
      fps = 0;
    }
}
【运行效果】
05_AnimatedGIFPanel_SD
【代码分析】
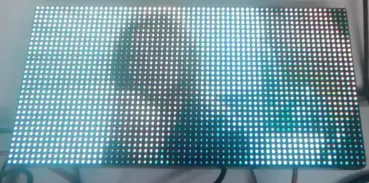
setup():完成 SD 卡、HUB75 面板和 GIF 解码器的初始化,为后续播放 GIF 动画做准备。SD_MMC.setPins():配置 SD 卡使用的时钟、命令和数据引脚。SD_MMC.begin("/sdcard", true):以 1-bit 模式挂载 SD 卡文件系统。SD_MMC.cardType()、cardSize()、totalBytes()、usedBytes():读取卡类型、容量和空间占用信息,用于确认存储介质状态。HUB75_I2S_CFG mxconfig(...):配置 HUB75 面板的宽度、高度和级联数量。dma_display = new MatrixPanel_I2S_DMA(mxconfig):创建 DMA 显示对象。dma_display->begin():启动 DMA 显示并分配显示缓冲区。SD_MMC.open("/gifs"):打开 GIF 文件目录。root.openNextFile():遍历/gifs目录中的文件。GifFiles.push_back(filename):将找到的 GIF 文件路径保存到列表中,供后续循环播放使用。gif.begin(LITTLE_ENDIAN_PIXELS):初始化 GIF 解码器,并设置像素字节序。
void setup()
{
    Serial.begin(115200);

    // **************************** Setup SD Card access via SD_MMC 1-bit ****************************
    if (!SD_MMC.setPins(BSP_SD_CLK, BSP_SD_CMD, BSP_SD_D0)) {
        Serial.println("SD_MMC setPins Failed");
        return;
    }

    if(!SD_MMC.begin("/sdcard", true)){
        Serial.println("Card Mount Failed");
        return;
    }
    uint8_t cardType = SD_MMC.cardType();

    if(cardType == CARD_NONE){
        Serial.println("No SD card attached");
        return;
    }

    Serial.print("SD Card Type: ");
    if(cardType == CARD_MMC){
        Serial.println("MMC");
    } else if(cardType == CARD_SD){
        Serial.println("SDSC");
    } else if(cardType == CARD_SDHC){
        Serial.println("SDHC");
    } else {
        Serial.println("UNKNOWN");
    }

    uint64_t cardSize = SD_MMC.cardSize() / (1024 * 1024);
    Serial.printf("SD Card Size: %lluMB\n", cardSize);

    //listDir(SD_MMC, "/", 1, false);

    Serial.printf("Total space: %lluMB\n", SD_MMC.totalBytes() / (1024 * 1024));
    Serial.printf("Used space: %lluMB\n", SD_MMC.usedBytes() / (1024 * 1024));


    // **************************** Setup DMA Matrix ****************************
    HUB75_I2S_CFG mxconfig(
      PANEL_RES_X,   // module width
      PANEL_RES_Y,   // module height
      PANEL_CHAIN    // Chain length
    );

    // Keep ESP32-S3 default HUB75 mapping to avoid Flash/PSRAM reserved pins.

    //mxconfig.clkphase = false;
    //mxconfig.driver = HUB75_I2S_CFG::FM6126A;

    // Display Setup
    dma_display = new MatrixPanel_I2S_DMA(mxconfig);

    // Allocate memory and start DMA display
    if( not dma_display->begin() )
        Serial.println("****** !KABOOM! HUB75 memory allocation failed ***********");

    dma_display->setBrightness8(128); //0-255
    dma_display->clearScreen();


    // **************************** Setup Sketch ****************************
    Serial.println("Starting AnimatedGIFs Sketch");

    // SD CARD STOPS WORKING WITH DMA DISPLAY ENABLED>...

    File root = SD_MMC.open("/gifs");
    if(!root){
        Serial.println("Failed to open directory");
        return;
    }

    File file = root.openNextFile();
    while(file){
        if(!file.isDirectory())
        {
            Serial.print("  FILE: ");
            Serial.print(file.name());
            Serial.print("  SIZE: ");
            Serial.println(file.size());

            std::string filename = "/gifs/" + std::string(file.name());
            Serial.println(filename.c_str());

            GifFiles.push_back( filename );
         //   Serial.println("Adding to gif list:" + String(filename));
            totalFiles++;

        }
        file = root.openNextFile();
    }

    file.close();
    Serial.printf("Found %d GIFs to play.", totalFiles);
    //totalFiles = getGifInventory("/gifs");


  // This is important - Set the right endianness.
  gif.begin(LITTLE_ENDIAN_PIXELS);

}
【运行效果】
06_BitmapIcons
【代码分析】
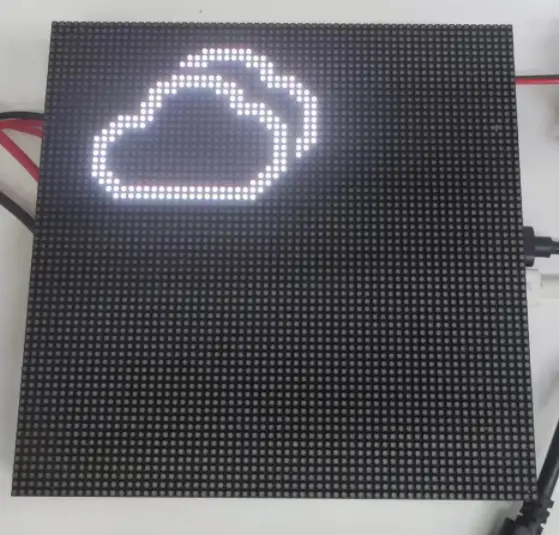
setup():完成显示初始化,并通过渐变方式绘制 WiFi 图标,验证位图资源与绘制接口是否正常。dma_display->begin():启动 HUB75 面板显示。dma_display->setBrightness8(90):设置面板亮度。dma_display->fillScreen()/dma_display->clearScreen():初始化和切换阶段清空画面,避免残影干扰。for (int r = 0; r < 255; r++):逐步增加红色分量,用于生成淡入动画。drawXbm565(0,0,64,32, wifi_image1bit, ...):将 WiFi 的 XBM 位图绘制到屏幕上。loop():循环切换不同图标,实现图标轮播显示。drawXbm565(5,0, 32, 32, icon_bits[current_icon]):绘制当前索引对应的图标数据。icon_name[current_icon]:通过串口输出当前显示的图标名称,便于调试。current_icon = (current_icon + 1) % num_icons:循环更新图标索引,确保轮播不会越界。
void setup() {

  // put your setup code here, to run once:
  delay(1000); Serial.begin(115200); delay(200);


  /************** DISPLAY **************/
  Sprintln("...Starting Display");
  dma_display = new MatrixPanel_I2S_DMA(mxconfig);
  dma_display->begin();
  dma_display->setBrightness8(90); //0-255
  dma_display->clearScreen();

  dma_display->fillScreen(dma_display->color444(0, 0, 0));

  // Fade a Red Wifi Logo In
  for (int r=0; r < 255; r++ )
  {
    drawXbm565(0,0,64,32, wifi_image1bit, dma_display->color565(r,0,0));
    delay(10);
  }

  delay(2000);
  dma_display->clearScreen();
}


void loop() {

  // Loop through Weather Icons
  Serial.print("Showing icon ");
  Serial.println(icon_name[current_icon]);
  drawXbm565(5,0, 32, 32, icon_bits[current_icon]);

  current_icon = (current_icon  +1 ) % num_icons;
  delay(2000);
  dma_display->clearScreen();

}
【运行效果】
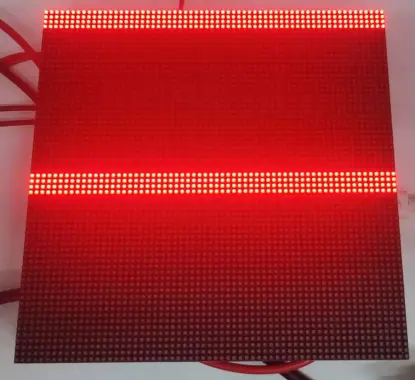
07_Pixel_Mapping_Test
【代码分析】
loop():按行列顺序逐点点亮像素,用于检查面板像素映射与软件配置是否一致。for (int i ...)/for (int j ...):遍历FourScanPanel的全部像素坐标。FourScanPanel->drawPixel(j, i, FourScanPanel->color565(255, 0, 0)):将当前像素点亮为红色,形成可观察的扫描轨迹。delay(30):让扫描点以较慢速度移动,便于观察实际点亮顺序。dma_display->clearScreen():整屏扫描完成后清空画面,开始下一轮测试。delay(2000):在每轮扫描结束后停留 2 秒,方便确认映射结果是否正确。
void loop() {
  for (int i = 0; i < FourScanPanel->height(); i++)
  {
    for (int j = 0; j < FourScanPanel->width(); j++)
    {
      FourScanPanel->drawPixel(j, i, FourScanPanel->color565(255, 0, 0));
      delay(30);
    }
  }
  delay(2000);
  dma_display->clearScreen();
} // end loop
【运行效果】
08_Sensor_Test
【代码分析】
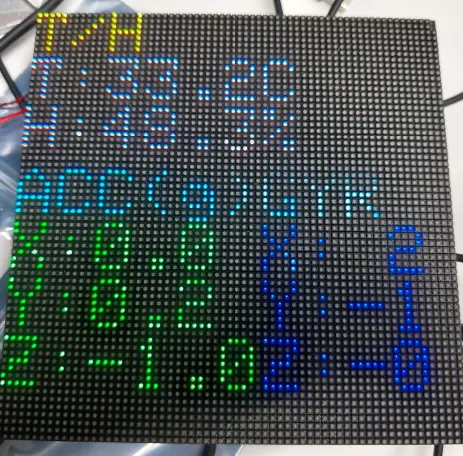
setup():依次完成串口、RGB 矩阵屏、I2C 总线和传感器的初始化,并在屏幕上显示初始化状态。initDisplay():配置 HUB75 面板参数(64x64,FM6126A 驱动),创建 DMA 显示对象并设置亮度。initI2cBus():在引脚 47(SDA)/ 48(SCL)上以 400 kHz 启动 I2C 总线。detectQmiAddress():依次探测 QMI8658 的两个可能的 I2C 地址(高地址和低地址),通过读取whoami寄存器(值0x05)确认设备身份。initShtc3():初始化 SHTC3 温湿度传感器并唤醒。initQmi8658():配置加速度计(±4g,125 Hz)和陀螺仪(±512 dps,112.1 Hz),并使能两路传感器。drawStatusScreen():显示传感器初始化状态,SHTC3 和 QMI8658 的 OK/FAIL 信息以绿色或红色区分。drawSensorScreen():在屏幕上分区域显示温度(摄氏度)、湿度(百分比)、加速度(g)和角速度(dps)数据。refreshSensors():分别调用readShtc3()和readQmi8658()读取最新传感器数据。loop():每 200 ms 刷新传感器数据并更新屏幕显示,每 1000 ms 通过串口输出一次传感器数据。
static void drawSensorScreen()
{
  if (!g_state.display_ok || dma_display == nullptr) {
    return;
  }

  dma_display->fillScreen(color_black);
  dma_display->setTextWrap(false);
  dma_display->setTextSize(1);

  drawLineText(0, 0, color_yellow, "T/H");
  drawLineText(0, 8, color_white, String("T:") + String(g_state.temp_c, 1) + "C");
  drawLineText(0, 16, color_white, String("H:") + String(g_state.hum_rh, 1) + "%");

  drawLineText(0, 26, color_cyan, "ACC(g)");
  drawLineText(0, 34, color_green, String("X:") + String(g_state.ax, 1));
  drawLineText(0, 42, color_green, String("Y:") + String(g_state.ay, 1));
  drawLineText(0, 50, color_green, String("Z:") + String(g_state.az, 1));

  drawLineText(36, 26, color_cyan, "GYR");
  drawLineText(36, 34, color_blue, String("X:") + String(g_state.gx, 0));
  drawLineText(36, 42, color_blue, String("Y:") + String(g_state.gy, 0));
  drawLineText(36, 50, color_blue, String("Z:") + String(g_state.gz, 0));
}
【运行效果】
09_Music_Player
【代码分析】
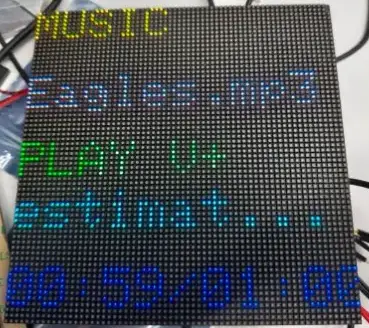
setup():依次完成串口、RGB 矩阵屏、按钮、SD 卡、ES8311 编解码器和音频输出的初始化,构建播放列表并开始播放第一首。mountSdCard():以 1-bit 模式挂载 SD 卡,配置 SD_CLK / SD_CMD / SD_D0 引脚。initCodec():通过 I2C 初始化 ES8311 编解码器,使能功放引脚(PA),设置 16 位采样深度和最大音量。initAudioOutput():配置 I2S 引脚(BCLK / LRC / DOUT / MCLK),注册音频事件回调函数。buildTrackList():递归扫描 SD 卡/music目录下的音频文件(mp3、wav、aac、m4a、flac),若/music为空则扫描根目录,结果按文件名排序。playTrackByIndex():停止当前播放,从 SD 卡打开指定音频文件并开始播放。handleButton():基于 BOOT 按钮实现单击(下一首)、双击(切换音量增减方向)和长按(连续调节音量)三种操作,内部通过软件消抖和状态机管理。changeVolumeStep():根据当前音量模式(增或减)调整一级音量,同时更新 Audio 库和 ES8311 编解码器的音量。processPendingActions():在双击检测窗口结束后处理待执行的音量模式切换或下一首请求。updateDisplay():在屏幕上显示曲目名称、播放状态、音量模式、状态信息和播放进度。loop():持续运行音频解码循环,处理按钮事件和待执行动作,每 150 ms 刷新一次屏幕。
static void handleButton()
{
  const uint32_t now = millis();
  const bool button_level = digitalRead(BOARD_BUTTON_PIN);
  const bool button_changed = button_level != g_player.last_button_level;

  if (button_changed) {
    if (now - g_player.last_button_ms < BUTTON_DEBOUNCE_MS) {
      return;
    }

    g_player.last_button_ms = now;
    g_player.last_button_level = button_level;

    if (!button_level) {
      g_player.button_pressed = true;
      g_player.button_press_ms = now;
      g_player.long_press_active = false;
      g_player.last_volume_repeat_ms = now;
      return;
    }

    g_player.button_pressed = false;
    if (g_player.long_press_active) {
      g_player.long_press_active = false;
      g_player.click_count = 0;
      return;
    }

    ++g_player.click_count;
    g_player.last_click_ms = now;
    return;
  }

  if (!g_player.button_pressed) {
    return;
  }

  if (!g_player.long_press_active) {
    if (now - g_player.button_press_ms < LONG_PRESS_MS) {
      return;
    }

    g_player.long_press_active = true;
    g_player.click_count = 0;
    changeVolumeStep();
    g_player.last_volume_repeat_ms = now;
    return;
  }

  if (now - g_player.last_volume_repeat_ms < VOLUME_REPEAT_MS) {
    return;
  }

  g_player.last_volume_repeat_ms = now;
  changeVolumeStep();
}
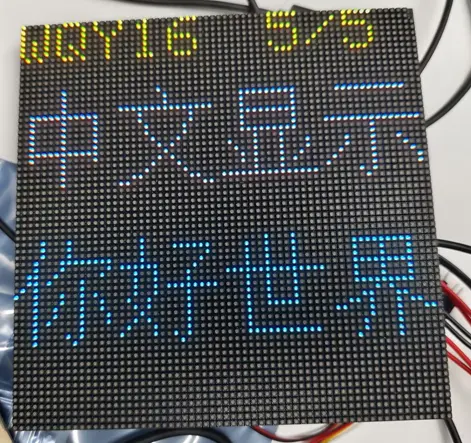
【运行效果】
10_Chinese_Font
【代码分析】
setup():初始化 HUB75 面板和 U8g2 字体渲染器,显示第一页中文字体。U8G2_FOR_ADAFRUIT_GFX u8g2_for_display:将 U8g2 字体引擎适配到 Adafruit GFX 接口,使 RGB 矩阵屏支持 UTF-8 中文渲染。kFontList[]:包含 5 种 WenQuanYi 文泉驿中文字体(12px 至 16px),均使用 GB2312 编码。drawCenteredUtf8Line():根据getUTF8Width()计算文本像素宽度,将文本在屏幕水平居中后绘制。drawPage():清屏后先以 GFX 默认字体显示当前字体名称和序号,再切换到 U8g2 字体居中绘制"中文显示"和"你好世界"两行文字。loop():每 1600 ms 自动切换到下一个字体,循环展示 5 种字号的中文字符渲染效果。
static void drawPage(uint8_t font_index)
{
  const ChineseFontEntry &entry = kFontList[font_index];

  dma_display->fillScreen(dma_display->color565(0, 0, 0));
  dma_display->setTextSize(1);
  dma_display->setTextWrap(false);
  dma_display->setTextColor(dma_display->color565(255, 255, 0));
  dma_display->setCursor(0, 0);
  dma_display->print(entry.name);
  dma_display->setCursor(40, 0);
  dma_display->print(font_index + 1);
  dma_display->print("/");
  dma_display->print(sizeof(kFontList) / sizeof(kFontList[0]));

  u8g2_for_display.setFontMode(1);
  u8g2_for_display.setFontDirection(0);
  u8g2_for_display.setFont(entry.font);

  drawCenteredUtf8Line("中文显示", 26, dma_display->color565(255, 255, 255));
  drawCenteredUtf8Line("你好世界", 50, dma_display->color565(80, 220, 255));
}
【运行效果】